
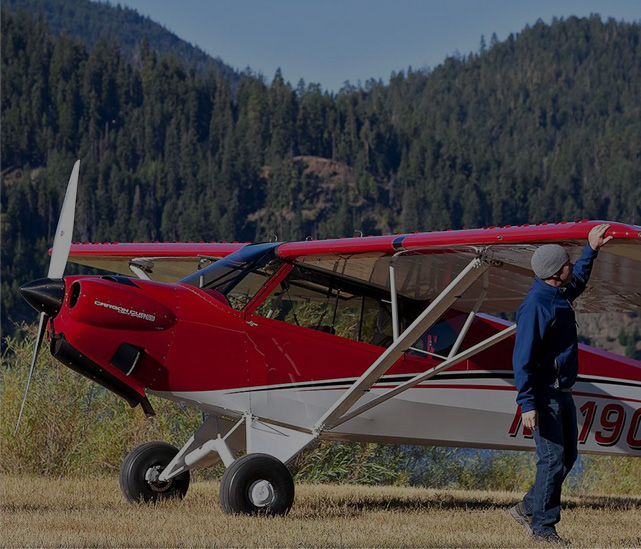
Mark Keneston is CubCrafters’ Sales Manager in the Great Lakes/Northeast Territory
10/2/2019 PROGRESS UPDATE
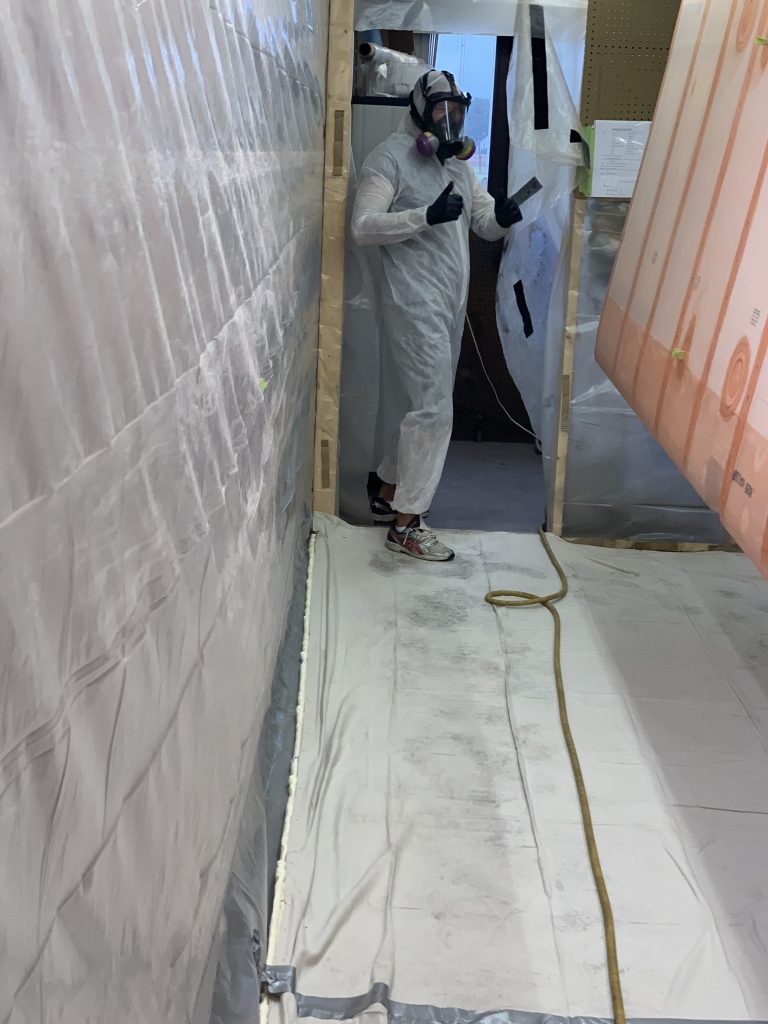
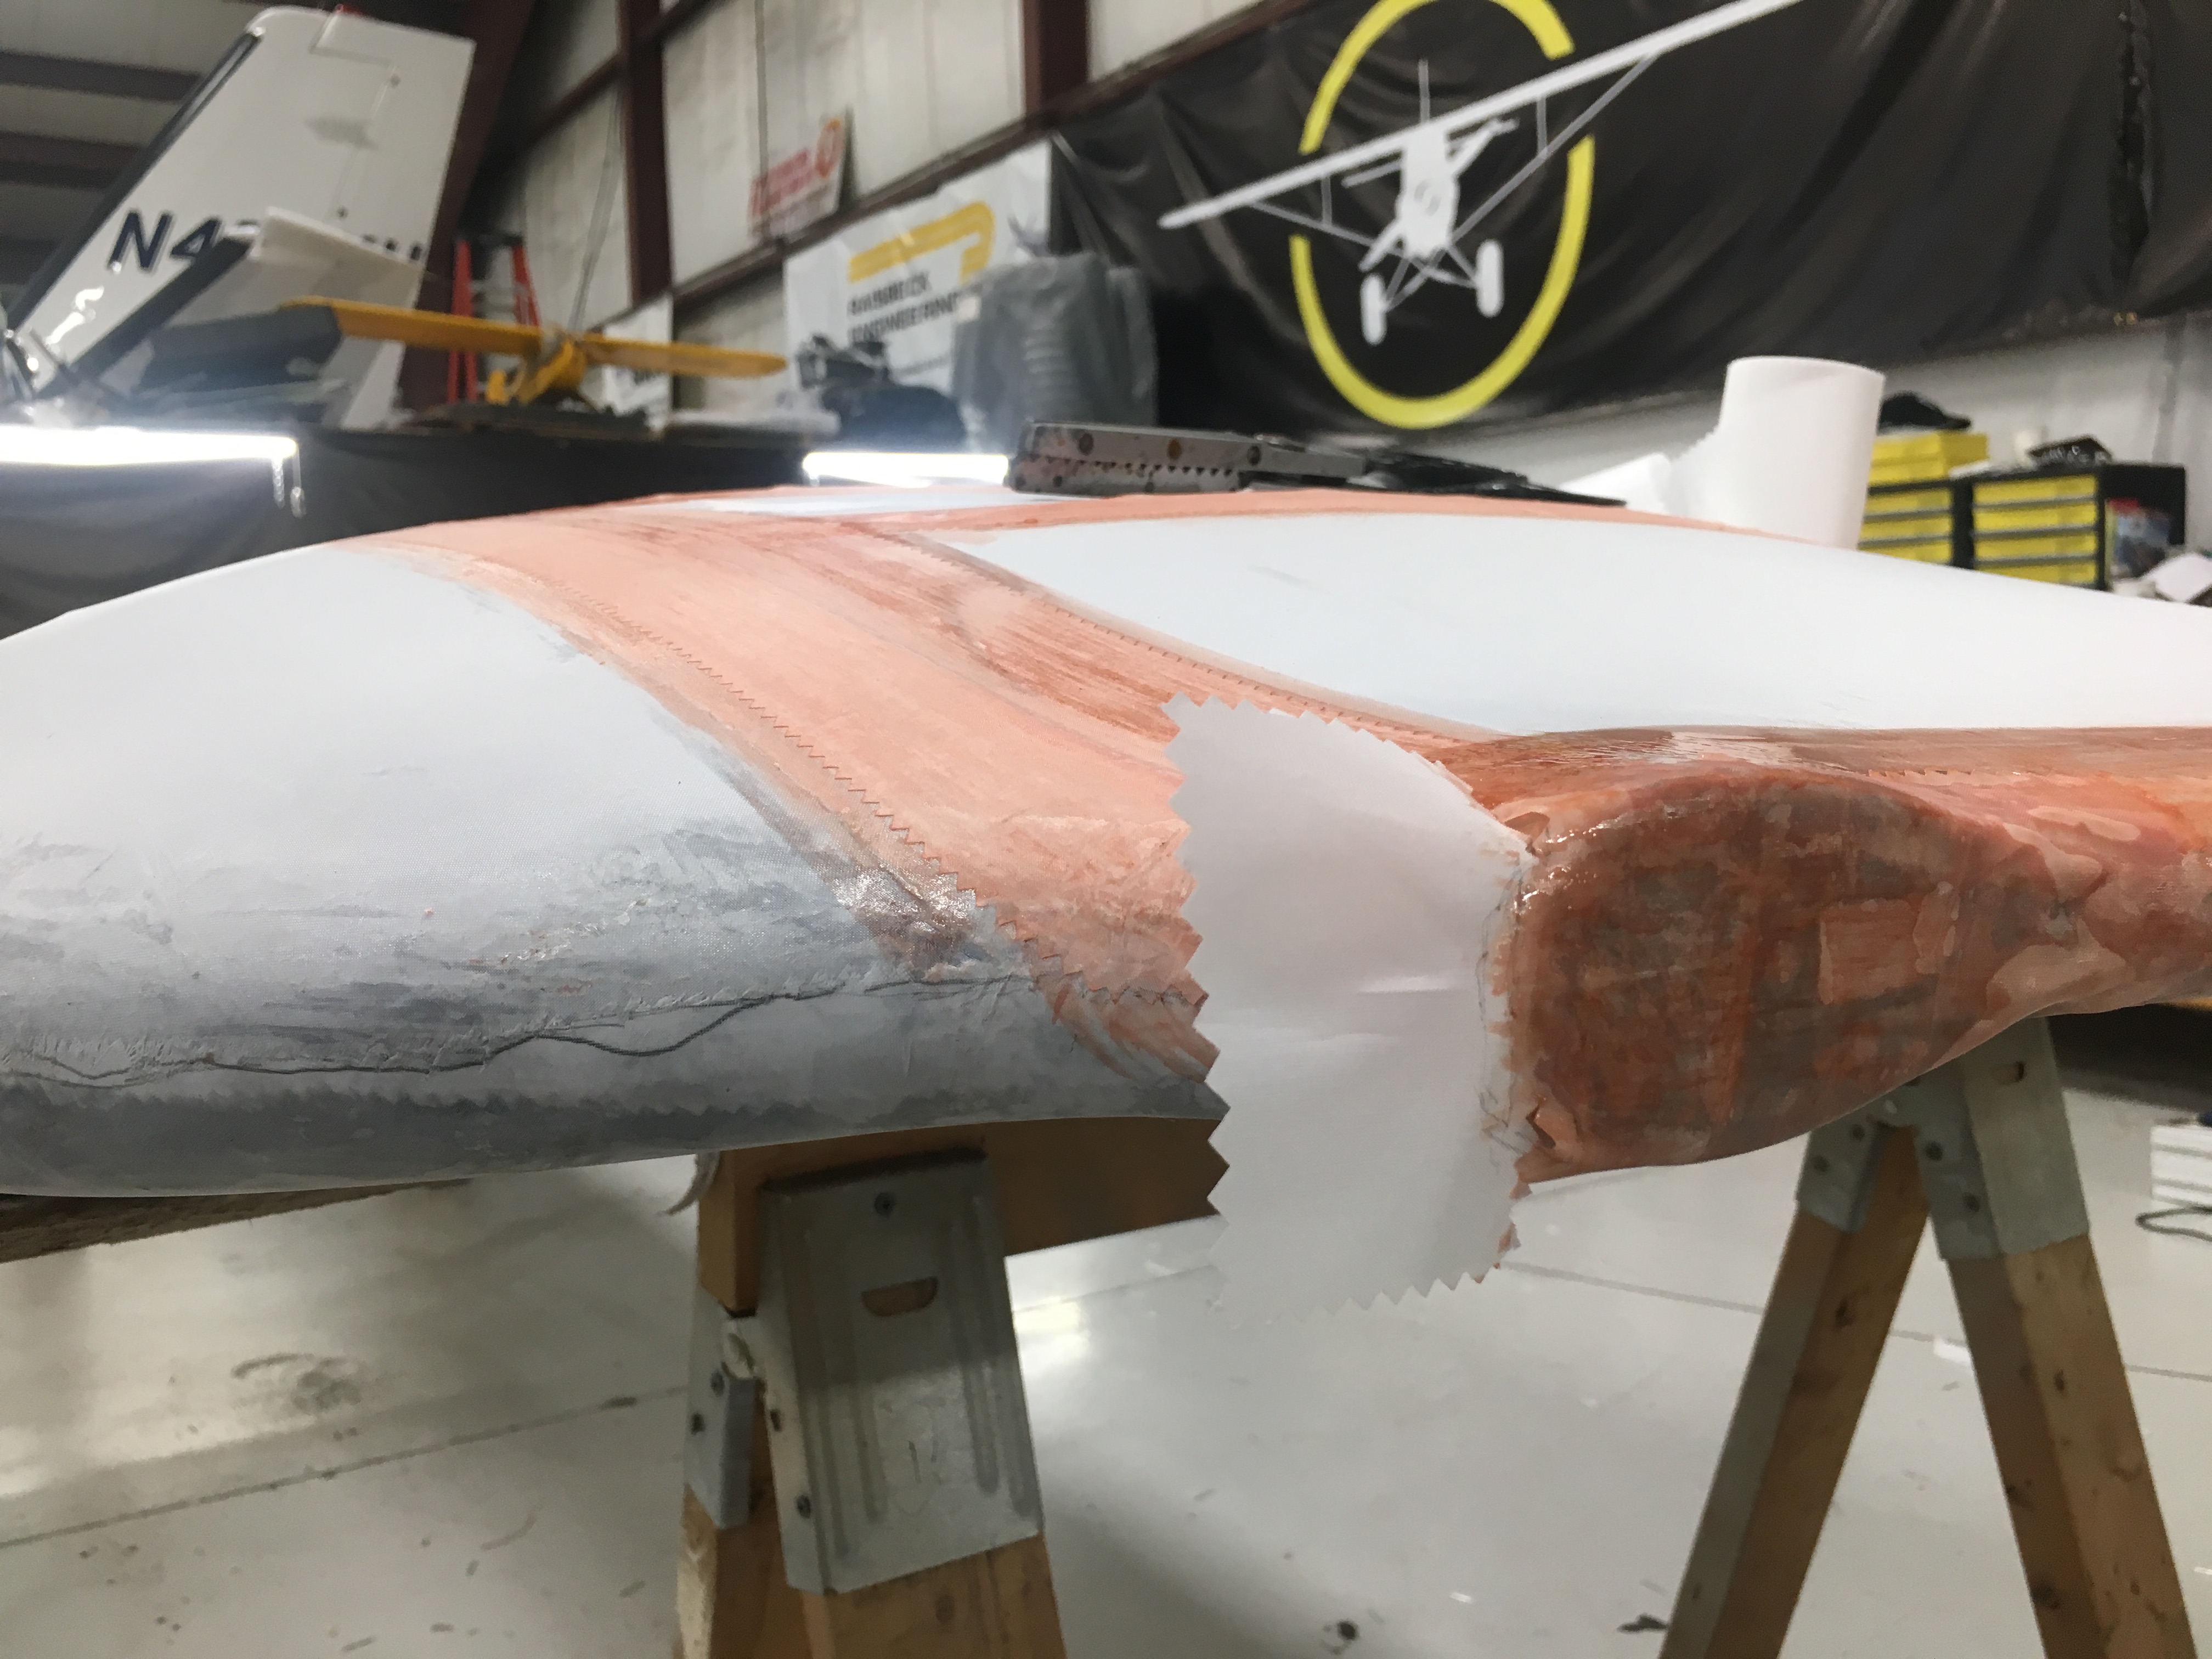
Hi again from the Yankee 1 skunkworks shop! Well…fall is here again. Since we last visited, we have had steady progress. As of this writing the tail feathers have been sprayed completely with poly brush and poly spray. The paint booth is being enlarged for the spraying of the wings and fuselage in the poly brush and poly spray.
The taping process was interesting, challenging and fun. I considered using the non-biased tapes for simplicity, but after talking to Mitch (our kit program manager) he said the factory uses regular tapes and he gave me tricks to use to make the sharper radius turns at the vertical stabilizer, wing tips and on the tail feathers. Getting the taped put down and in one place is part of the trick, but then pulling pressure and heat help make the turns come out nice. I do think I could be neater with my application of poly brush. I am not a hack but it seems I have had to take more time cleaning it up. I also learned from kit builder Stephen Michael that using a nice size piece of parchment paper under your iron at 225 degrees can really help meld in the poly brush into the weave of the fabric and help lay down or nib your tapes. Using the iron alone seems to collect poly brush on the iron and will deposit a harden streak of it in places you do not want it such as on top of rivet heads. The parchment paper avoids this messy clean up. Thank you for your help Steve!

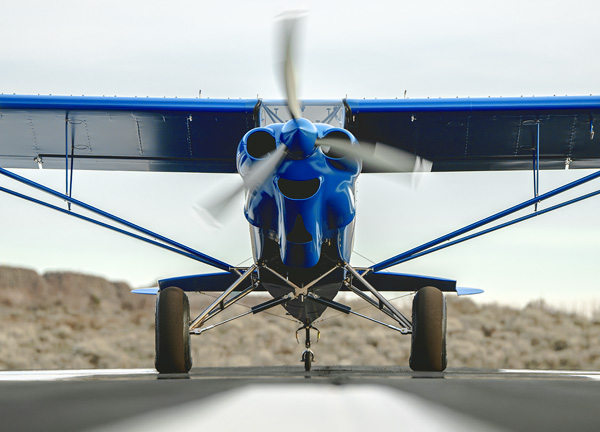
So now we will get the poly brush and poly spray on our wings and fuse. Hopefully all of you following along have also provided input on our selection of the paint scheme. I had a couple I really liked and one of those was not traditional and probably was not the best choice for the next demo aircraft. That said, we put some choices out to social media and the forum and hope to get some input from you on it. Being dubbed Yankee 1 it made sense to have it in blue over white with some red and silver. Let’s see what you think! From here it will go to PA for its paint application and I will give you update on that shortly. Thank you for following along.
The paint scheme poll runs until CubFest! Vote now on Facebook here: Yankee 1 Paint Poll
8/8/2019 PROGRESS UPDATE
Welcome back! I’ve been very busy since we last checked in, especially with Airventure 2019. Hopefully you all have seen and heard the news from CubCrafters. Before leaving for the show I had Steve Michael from SWT Aviation come up from his home in TN. Steve is serial builder and a good one and now has his EX3 in paint and has started his assembly. He was kind enough to help me cover “Yankee One.”
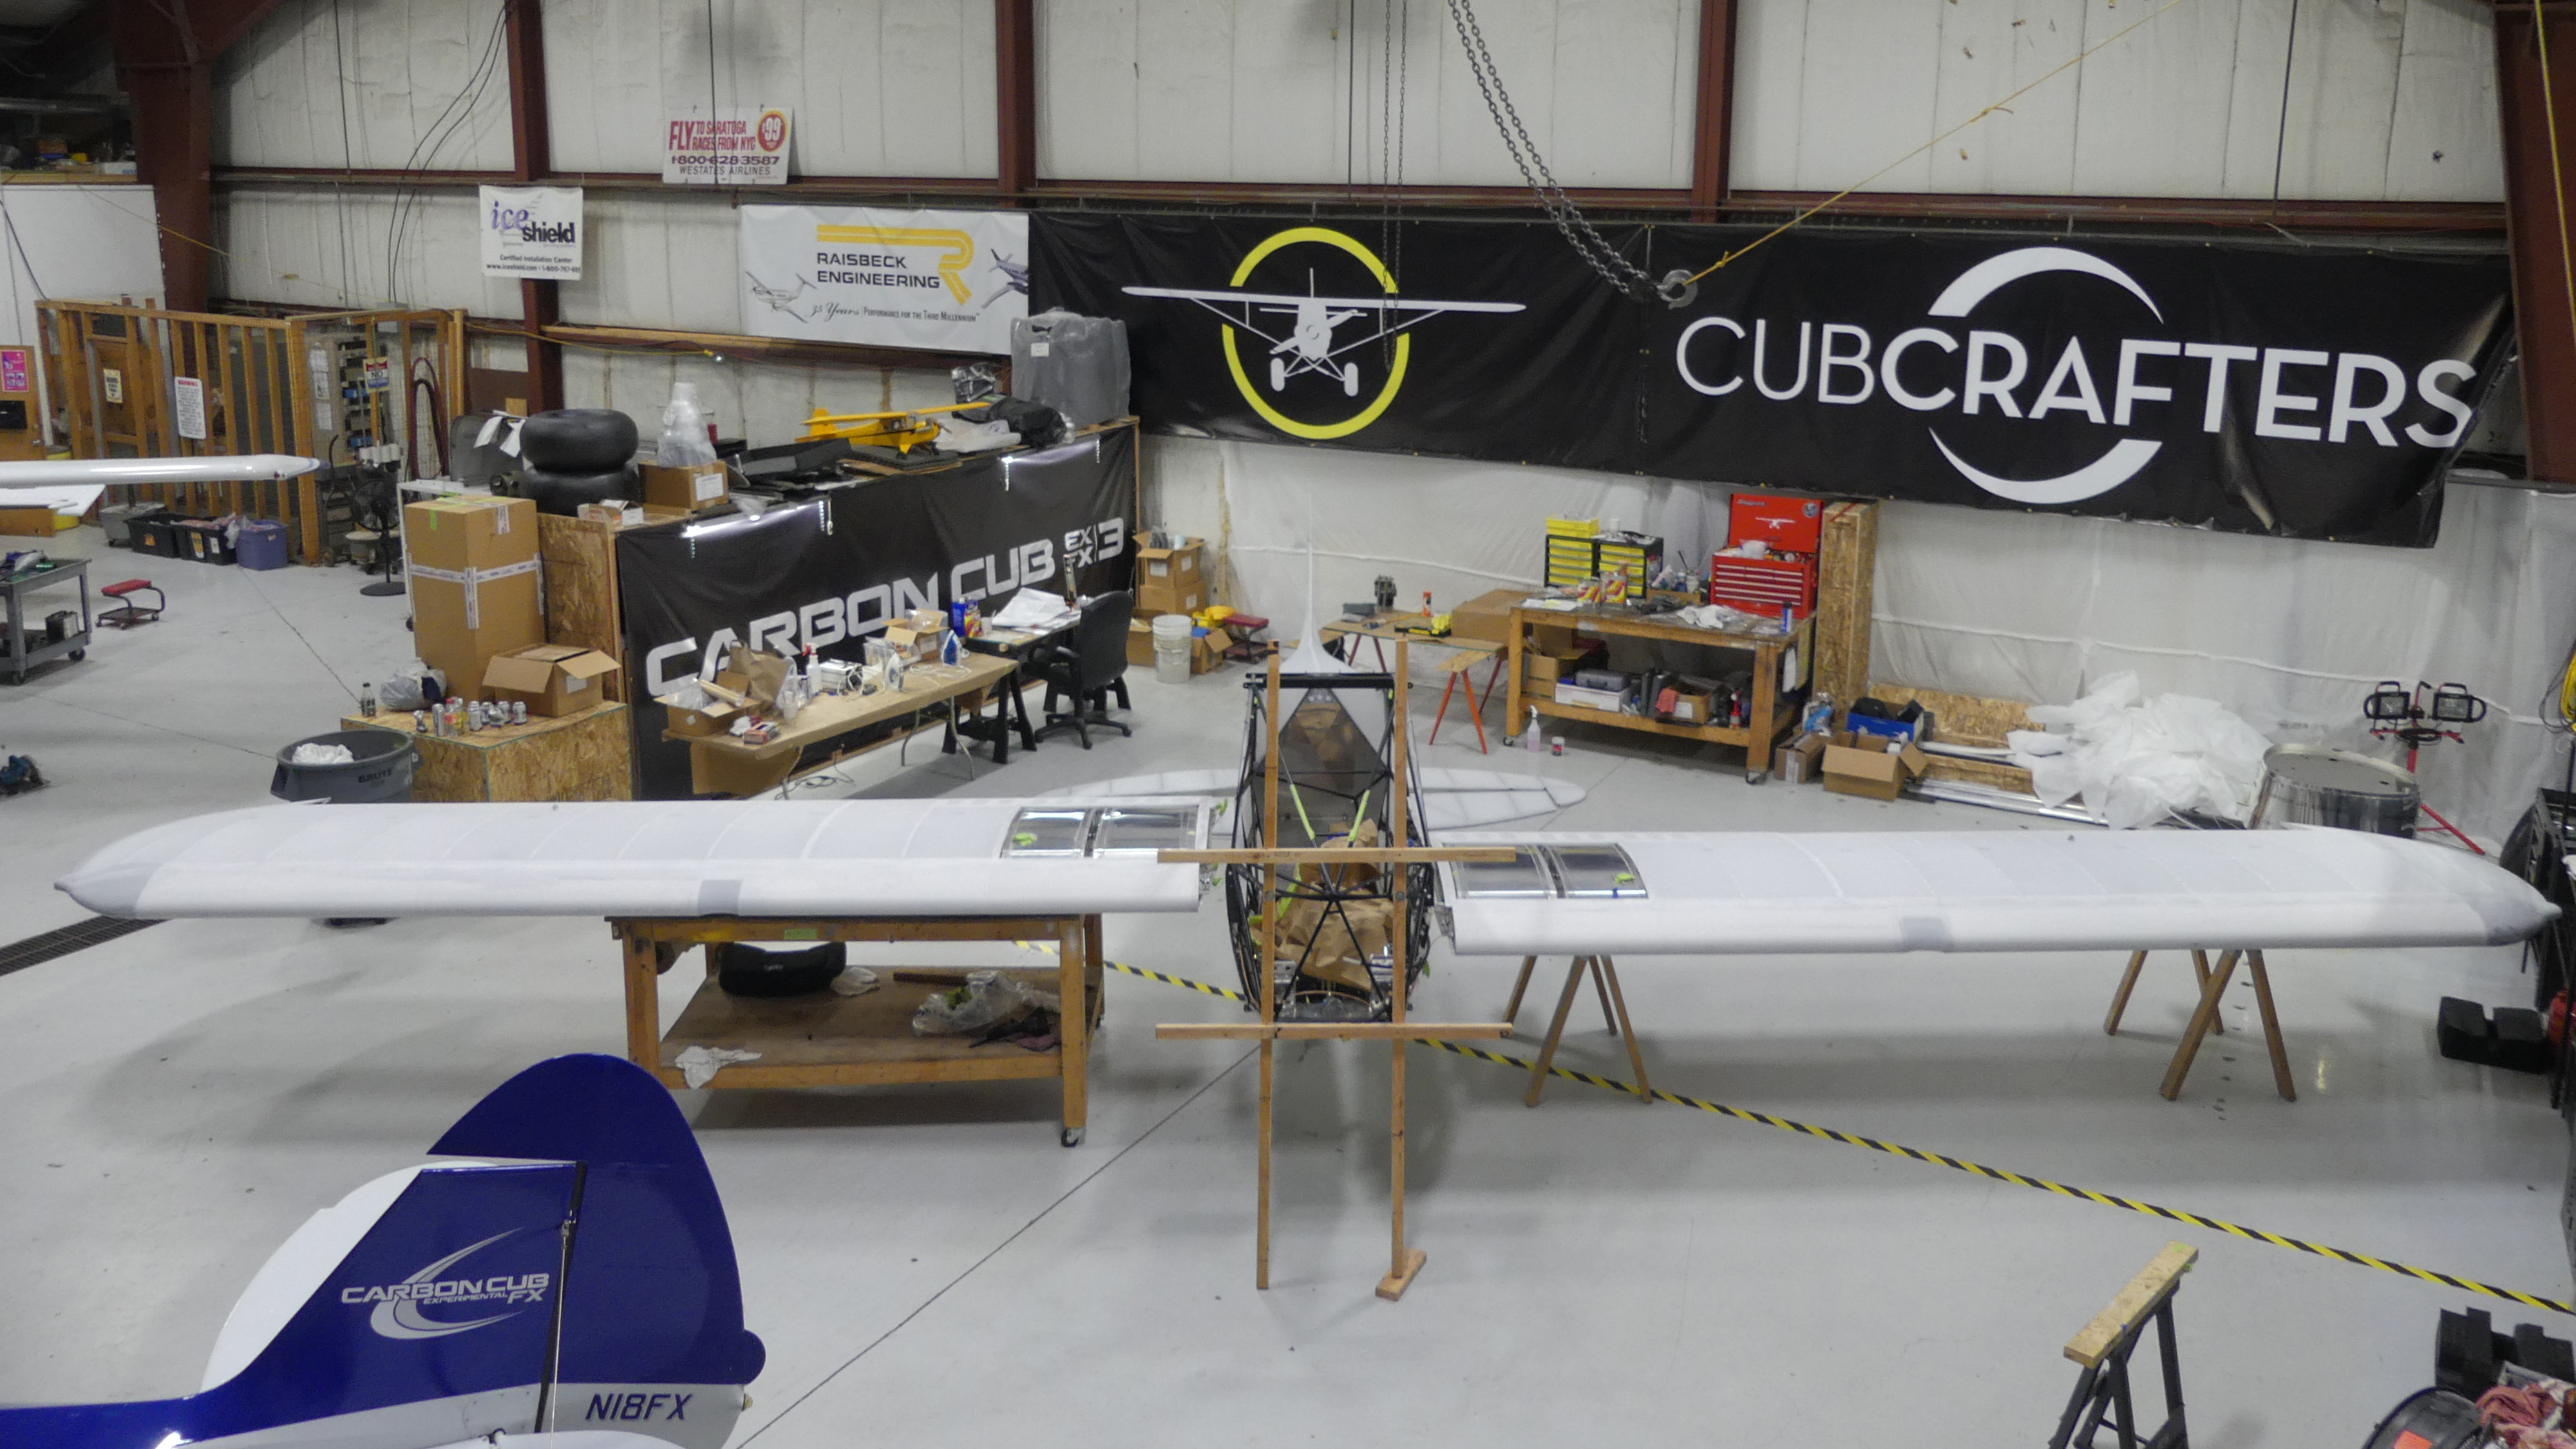
The plan was for Steve to arrive Saturday but he ended up arriving Monday evening due to poor weather. We spent a total of 3 full days covering both the wings and fuselage. I have previous experience covering but it had been awhile. Working with Steve brought it all back. We started by snapping a chalk line on the leading edge of the wing which allowed us to line up the fabric perfectly. As I swiftly applied the poly-tak, Steve was right after me laying the fabric in a straight line. I think 4 hands are critical in this application step and certainly saved frustration. That glue sets up quick. By getting the fabric straight on the initial step, you better guarantee a clean finish application of the fabric on the rest of the wing. You want to do all these steps well because it all will show up after being painted.
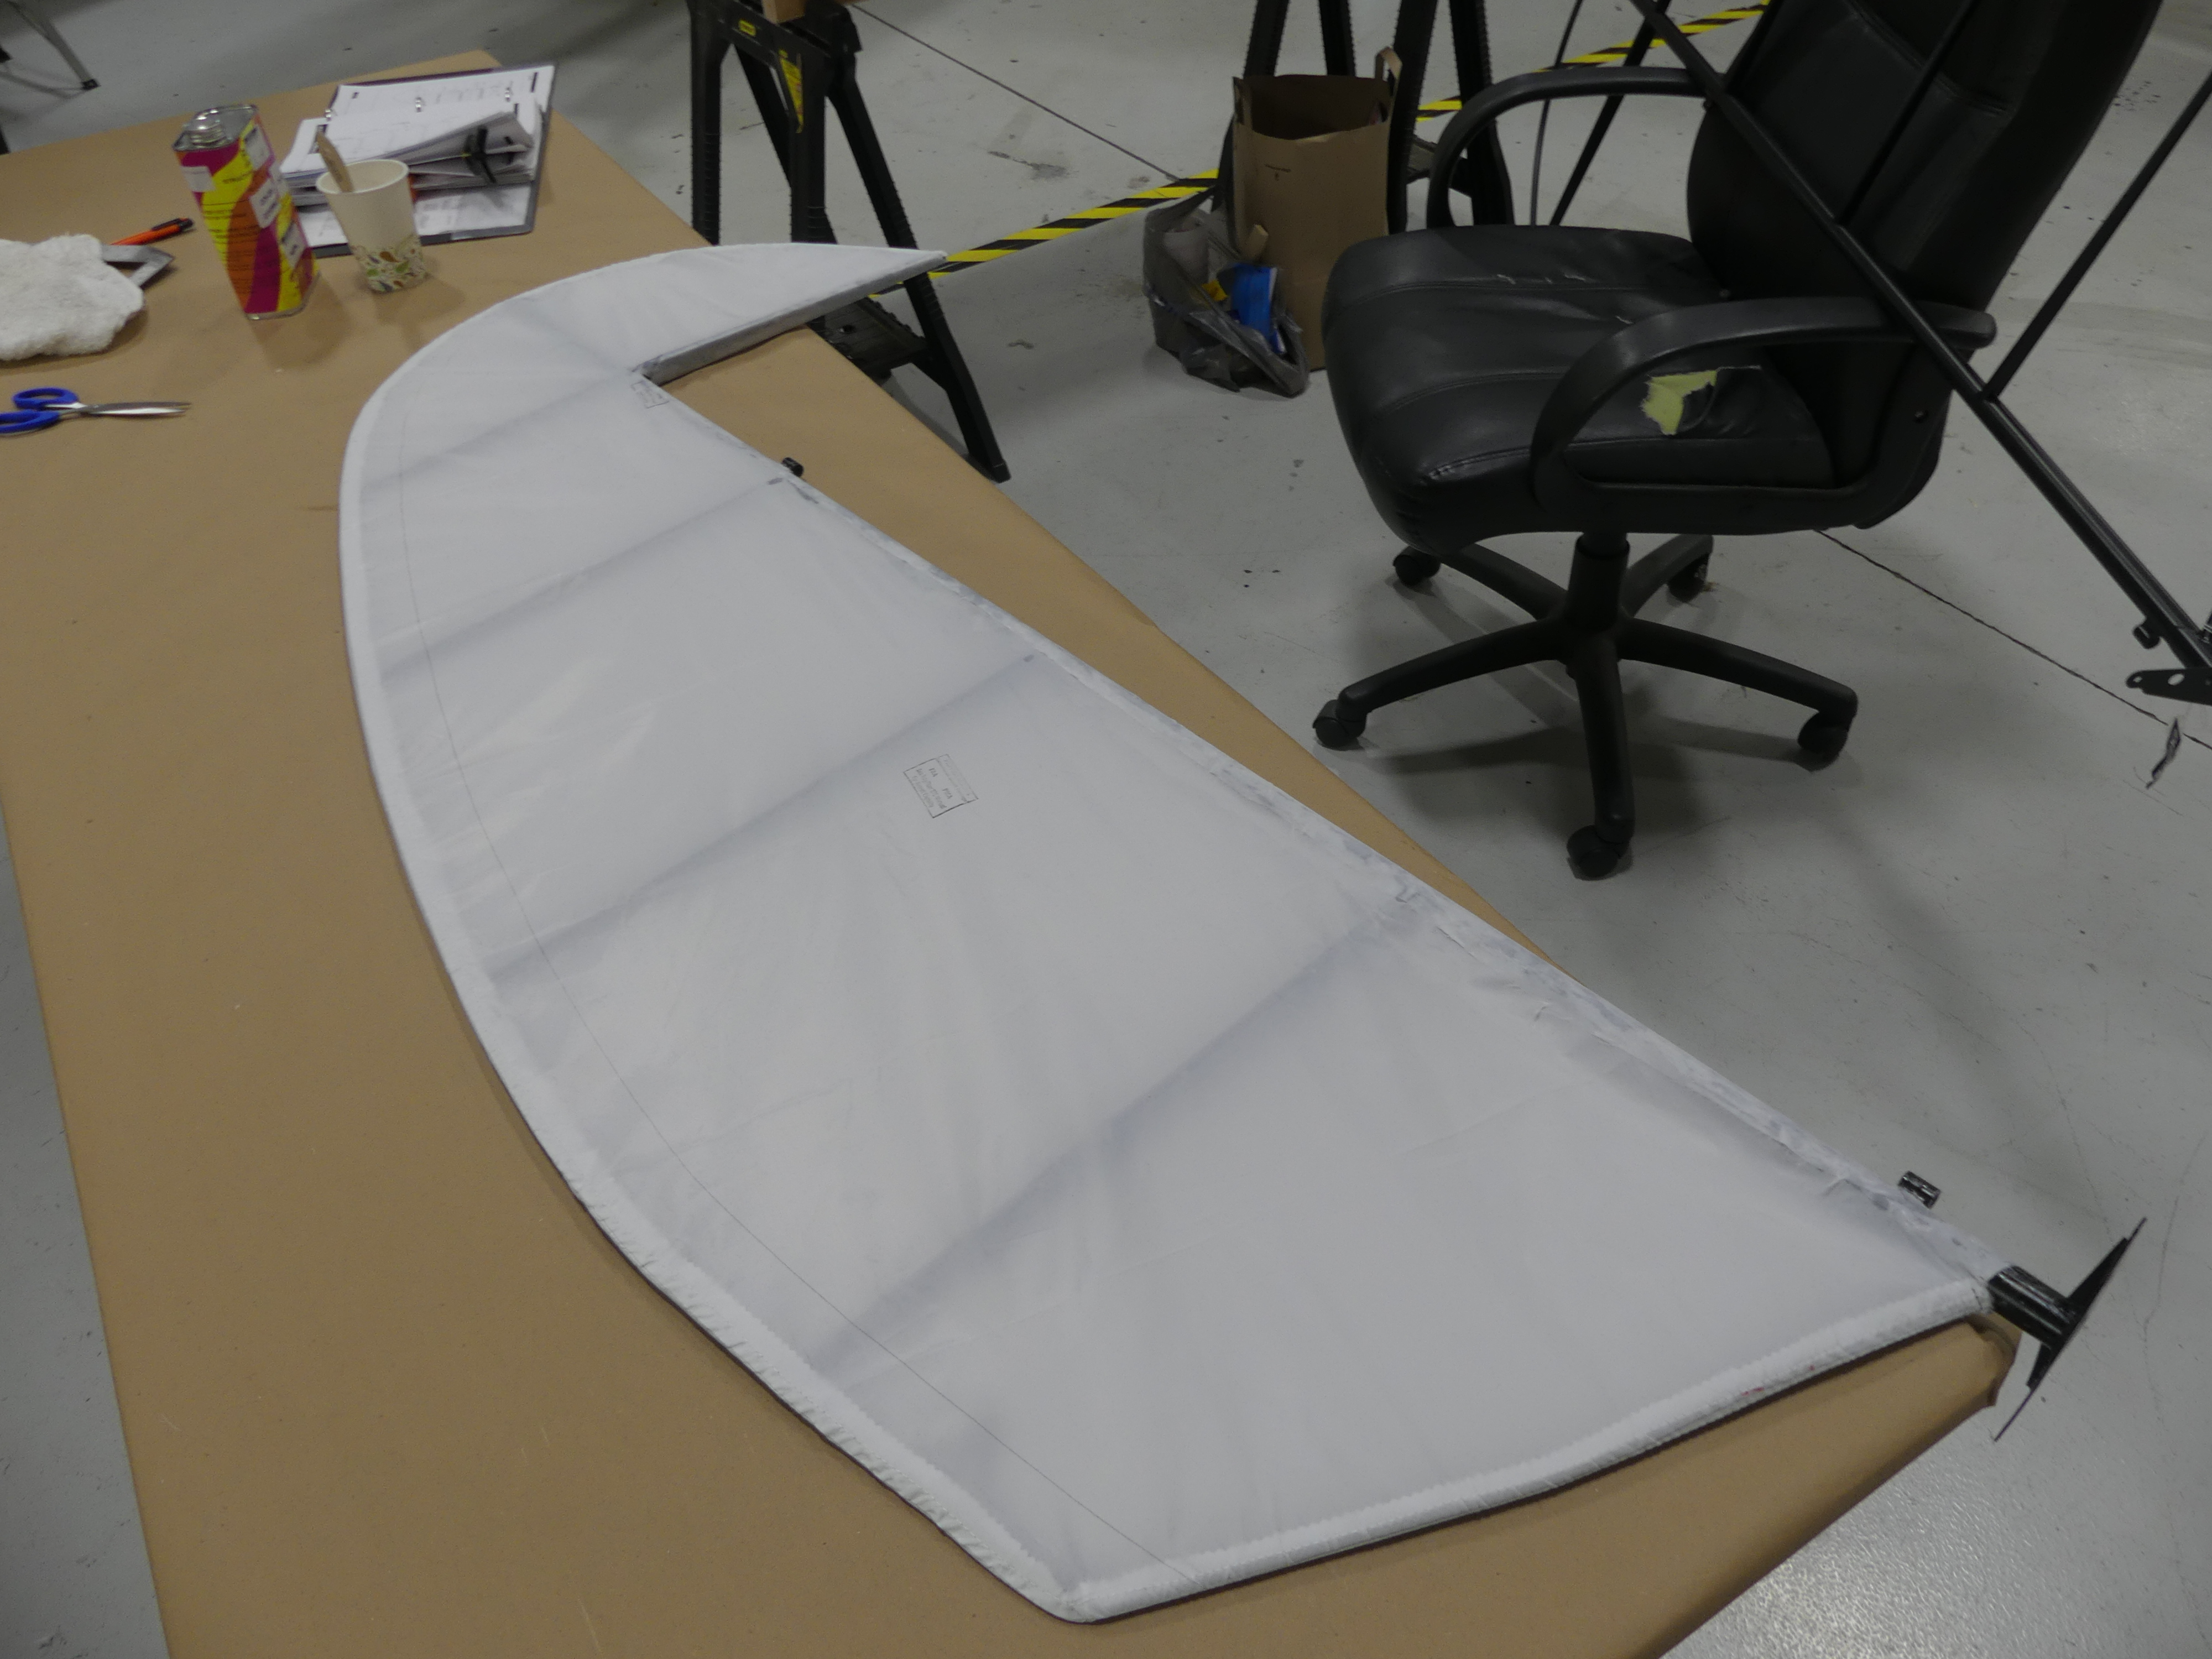
Working across the wing and onto the wing tip is probably the most challenging part of wing covering. Some pre forming of the fabric with the iron helps insure the fabric will make that radius and still lay down as needed without bunching or wrinkles. I would also suggest doing one complete side at a time with the iron as well. This way you are sure you have shrunk the fabric both at 250 and 350 degrees. Some care should be taken when cutting the fabric to fit around the aileron hinges and the pulleys as well at the strut attach points. In fact we covered over the strut attach points, shrunk it to 250 and then cut them gently with a soldering iron (NOT A KNIFE). We completed both wings in this manner and cut out the fabric over the fuel tank after it was all shrunk. This gives you a clean look. Leaving 1-1.5” of fabric over the edge of the ribs at the fuel tank allows you to glue that to ribs around the fuel tank. It looks quite nice. Now the wings are ready for rivets and tape. We managed to get one full wing done and half of the 2nd in a day.
Day 2 we finished the 2nd wing and jumped on the fuse by 10 am. We started with the bottom. While I don’t have a rotator, I did build the trusty stand out of 2x4s and bolted it to the front of the airframe. This probably is just as functional as the rotator but I’ll let you know after the paint steps. It is important to note that the prep steps are important prior to covering. That is scuffing the airframe with a scouring pad and then wiping completely with alcohol so you can apply the poly-tak. You want a clean, smooth and straight finished edge keeping in mind this will be covered with finish tapes. If you spend a little extra time making sure things look nice it all turns out better. It is just like building blocks, a nice first course helps insure a better finished product.
By Thursday afternoon “Yankee One” was covered. We even had a little extra time to set it up and do a short video and have a beer. Now the fuse is also ready for finish tapes too and then the spraying. I spent the next few days before OSH covering the tail feathers, riveting those and taping them. It won’t be long now and we will have it in paint. Stay tuned and look for an opportunity to be involved in our paint scheme selection. We have some ideas we want to run past you and we hope you will like them. Thanks for following along! Feel free to stop by the shop and check out the project for yourself.
6/28/2019 PROGRESS UPDATE
Here we are in June. My original goal of having “Yankee One” done and flying for OSH 19’ isn’t going to happen unfortunately. We’re into flying season, and I’ve been very busy since the Sun ‘n Fun show. The phone keeps ringing with customers. That has slowed my build process somewhat, but I’m still making great progress.
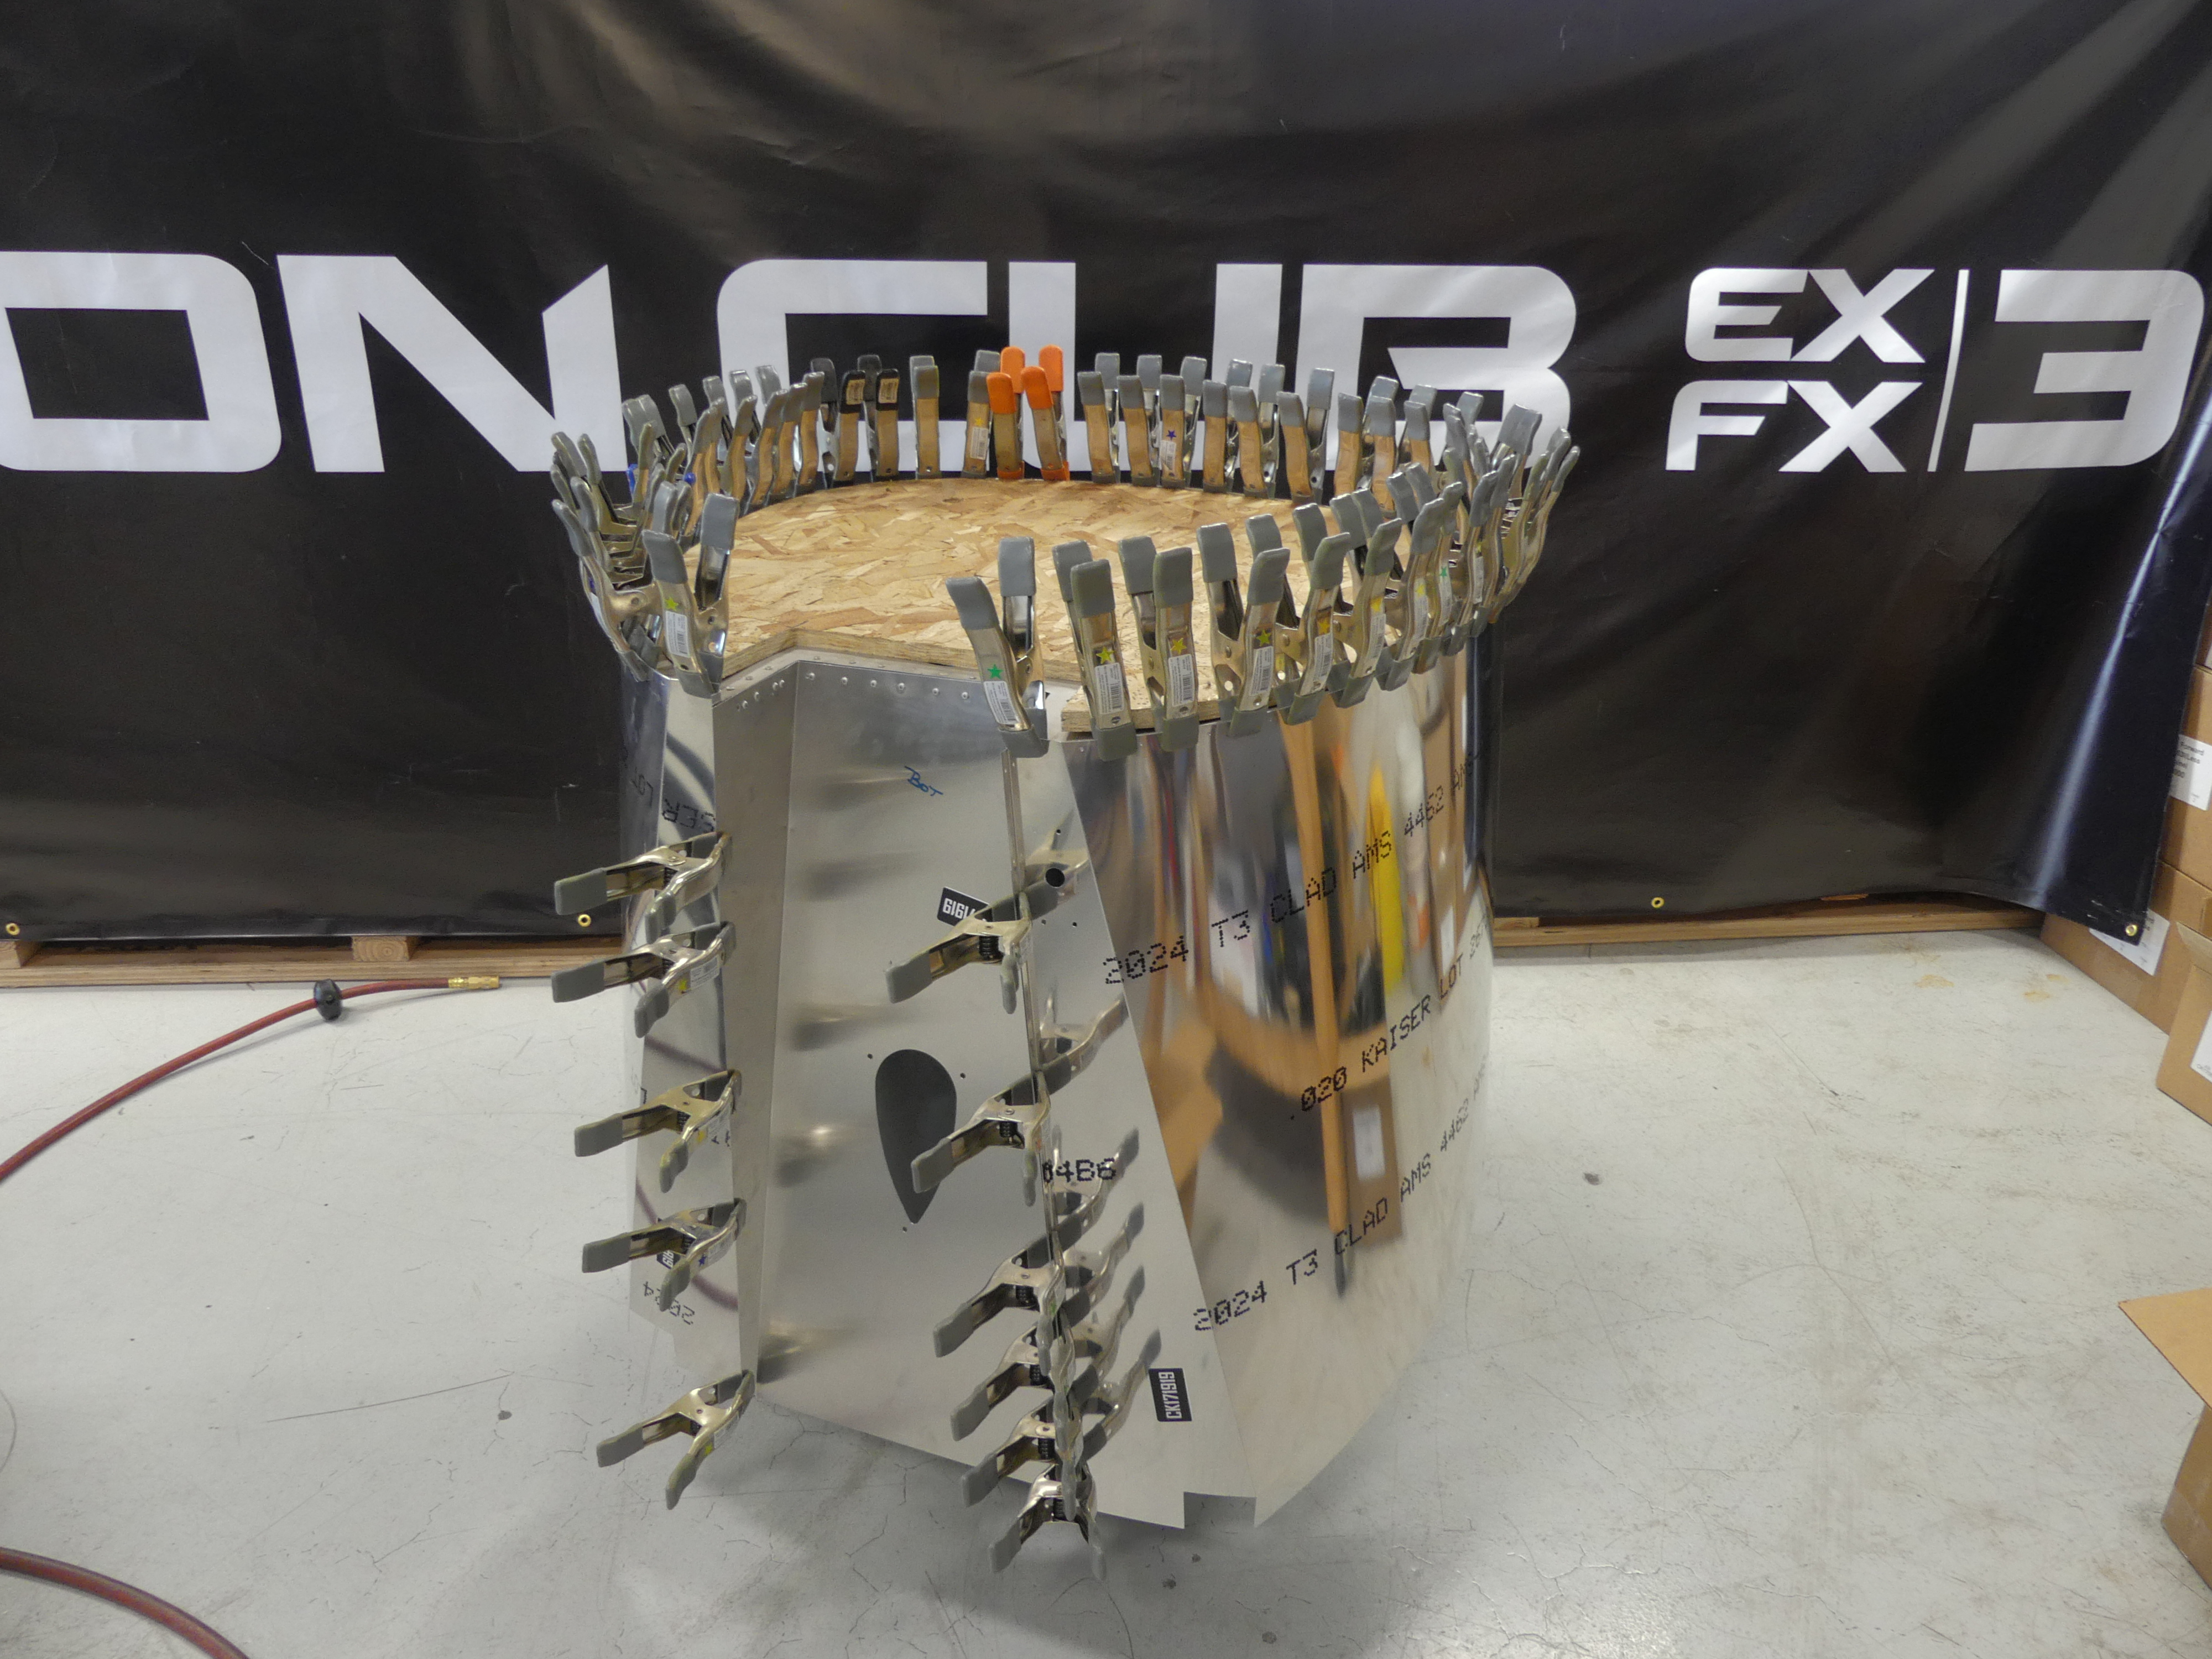
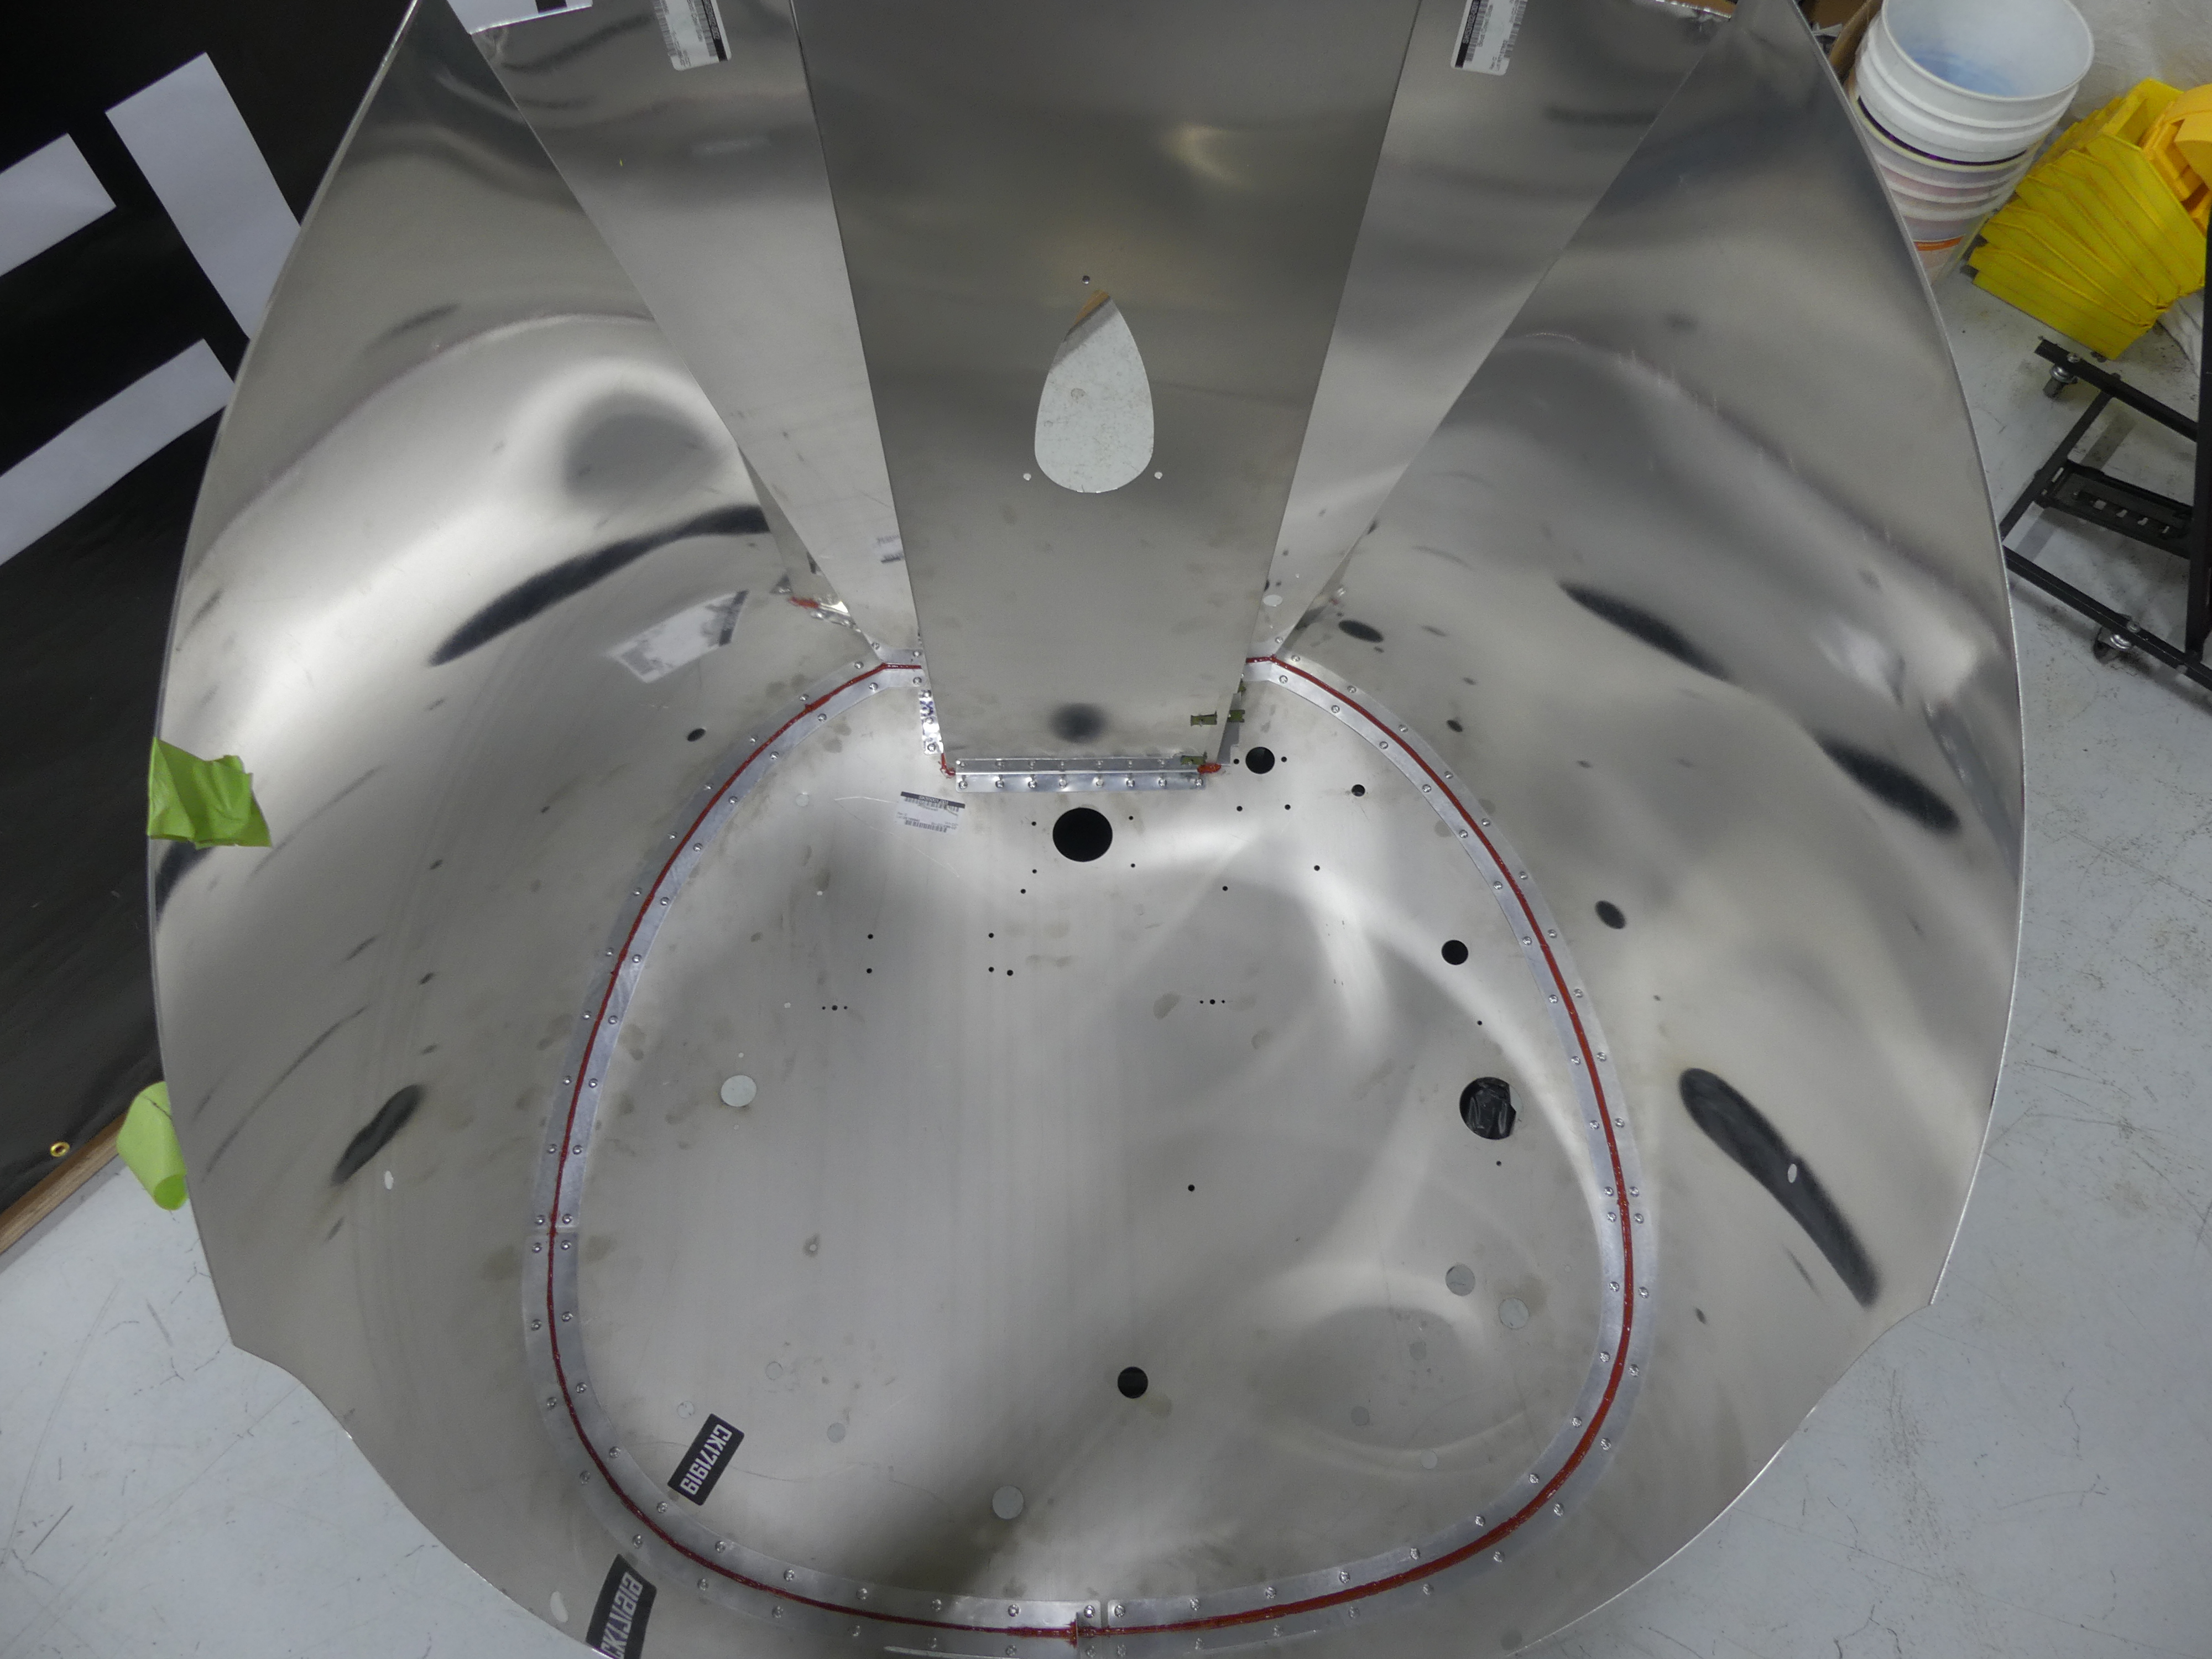
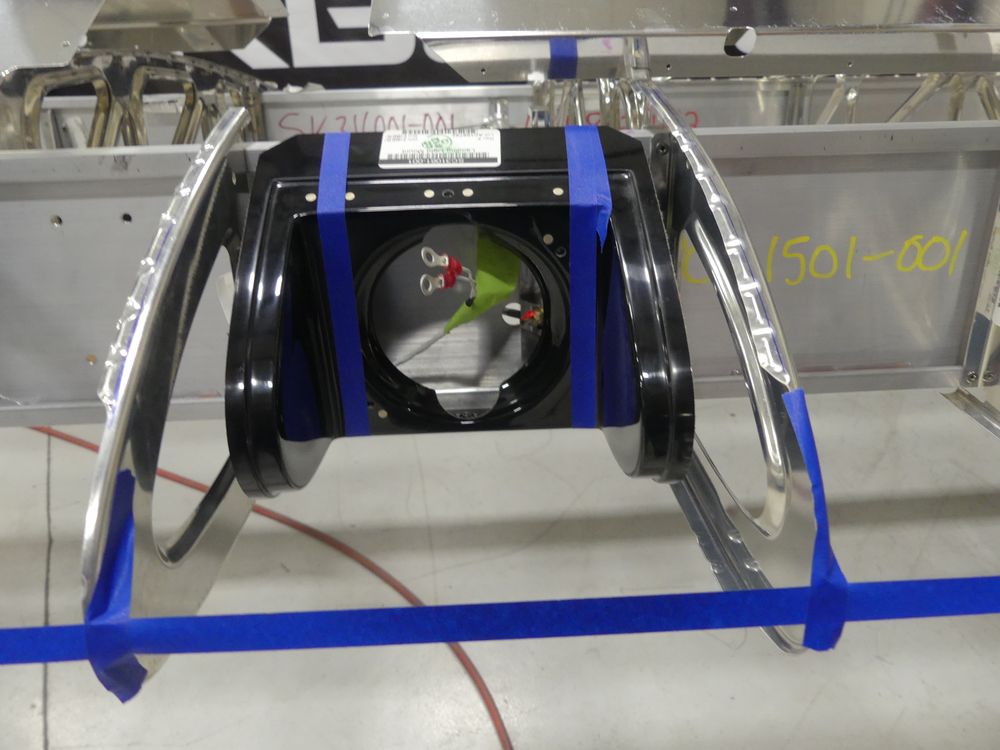
During May we completed some small remaining tasks and then dove into the boot cowl assembly. This might be the trickiest segment of the build next to the drilling of the spar for the support strip. The satisfaction of getting the boot cowl complete and near perfect was very nice. I might have over dimpled a few of my rivets, but with the filler and paint it will be fine. You can see in the videos that I had the boot cowl standing on its firewall on a 50 gallon garbage can on rollers. It turned out to be a nice work platform. I didn’t do the riveting on the 50 gal can but it was a great place to hang the side walls and get them clamped in place before positioning the whole unit on the nose of the frame. At the factory, we have a frame jig that stands vertical (like my garbage can setup) and this is ideal. I DO NOT suggest cutting up your frame just for that! But, it’s no wonder the factory boot cowls come out so nice. Once I had it all clamped (with 60 plus clamps) and hung it on the frame, I then needed to position it so it’s lined up fore and aft on the center line. This isn’t hard mind you, but it is tedious. Now you’re lining up the shims with the firewall ring and the boot cowl sides. The 4 pieces must mate up and be as flush to the front edge as possible before drilling. I used a putty knife to slide pieces and align things. The emphasis here is TAKING YOUR TIME! Once I was happy with the fitting of the 4 pieces, I would drill one hole at a time, dimple it and then squeeze a rivet. I’d suggest that you can get your hands on 2 rivet squeezers during your own boot cowl build. You will be happier for it.
I worked my way all around and then did the tunnel while it was on the nose of the frame. All in all, I am real happy with how it looks. I think it will show well after being painted. I pulled it down off the frame and inverted it on the garbage can stand. Then I can spin it while I put the temp sealant on the inside seam. This sealant will prevent any unwanted fumes, gases and liquids getting beyond the firewall while in flight. Take time with this step as well. My friend Peter was quite impressed with my application of the sealant. That stuff can be messy. Fortunately, I had some experience from my youth working as a window glazier in a glass shop. It looks darn good.
I am now on to tidying up details before cover and paint. I think we have a good plan in place going forward. I plan to reveal the proposed paint scheme for “Yankee One” very soon. For now, please check out our videos and look out for some exciting news from CubCrafters at AirVenture 2019. Carbon Cubs are the coolest! If you have not tried one, you’re missing out. Thanks for watching and following the build.
5/21/2019 PROGRESS UPDATE
It is spring in the Northeast and presently we have The Ark under construction here in the hanger. In fact the animals are starting to line up also. The weather has been particularly wet and spring can be this way here. Our local lakes, streams and rivers have burst their banks and we are lucky compared to other parts of the country.
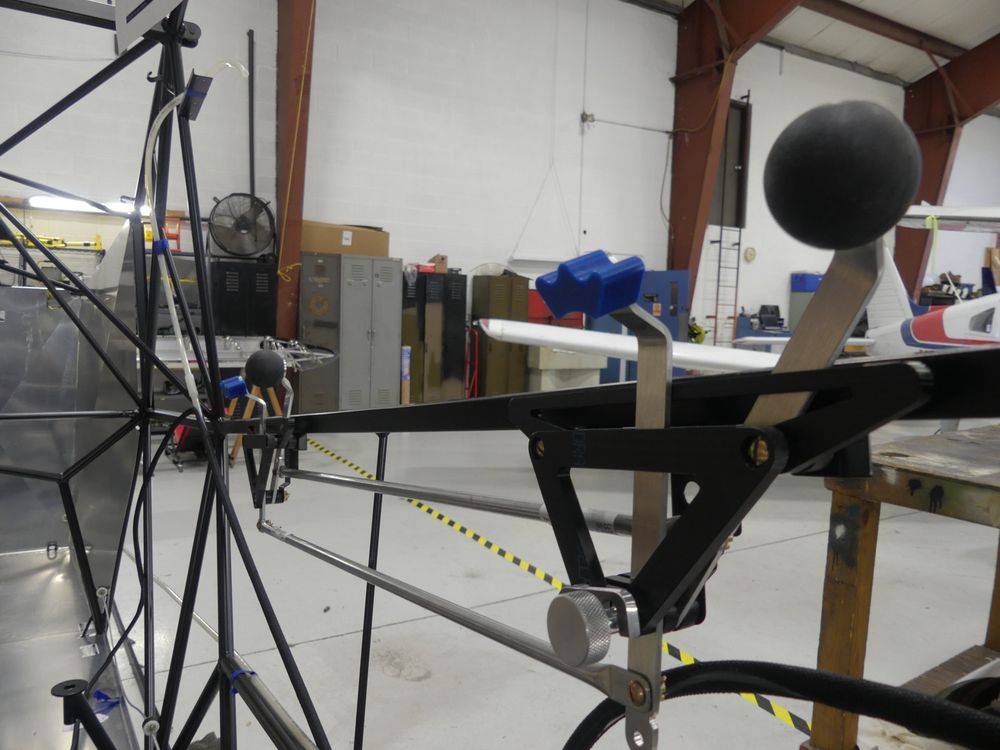
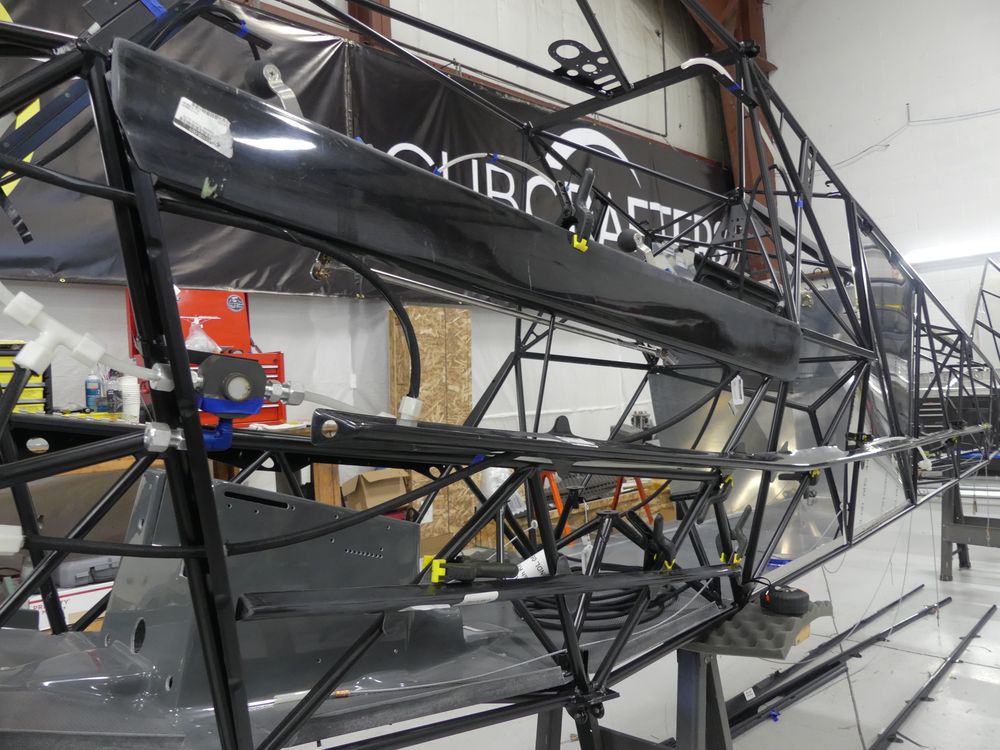
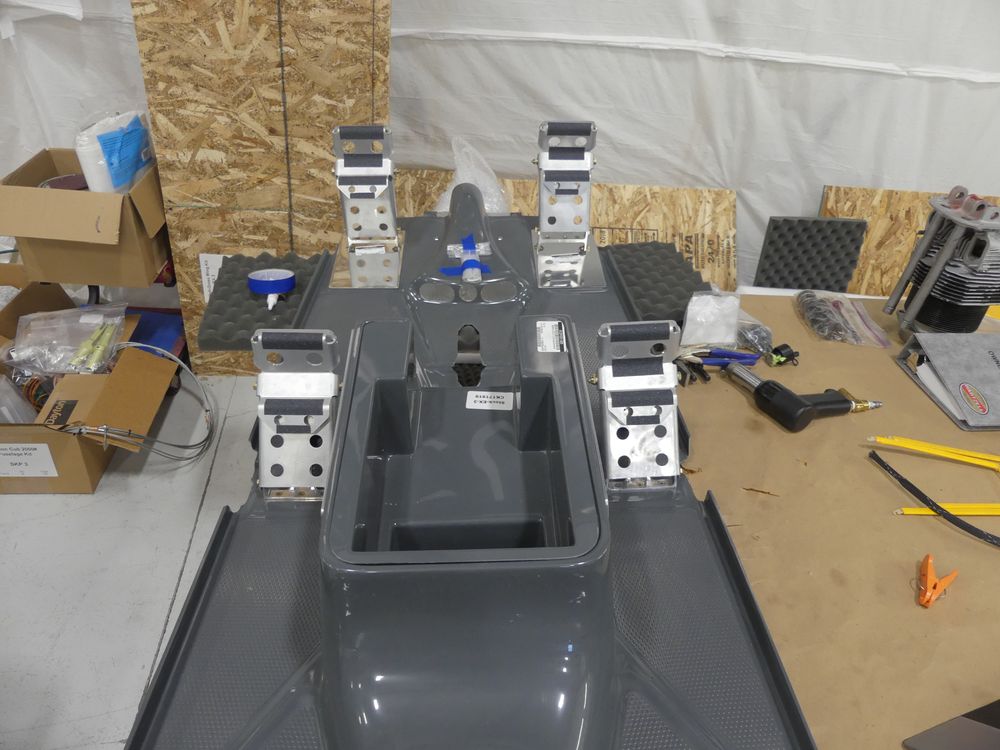
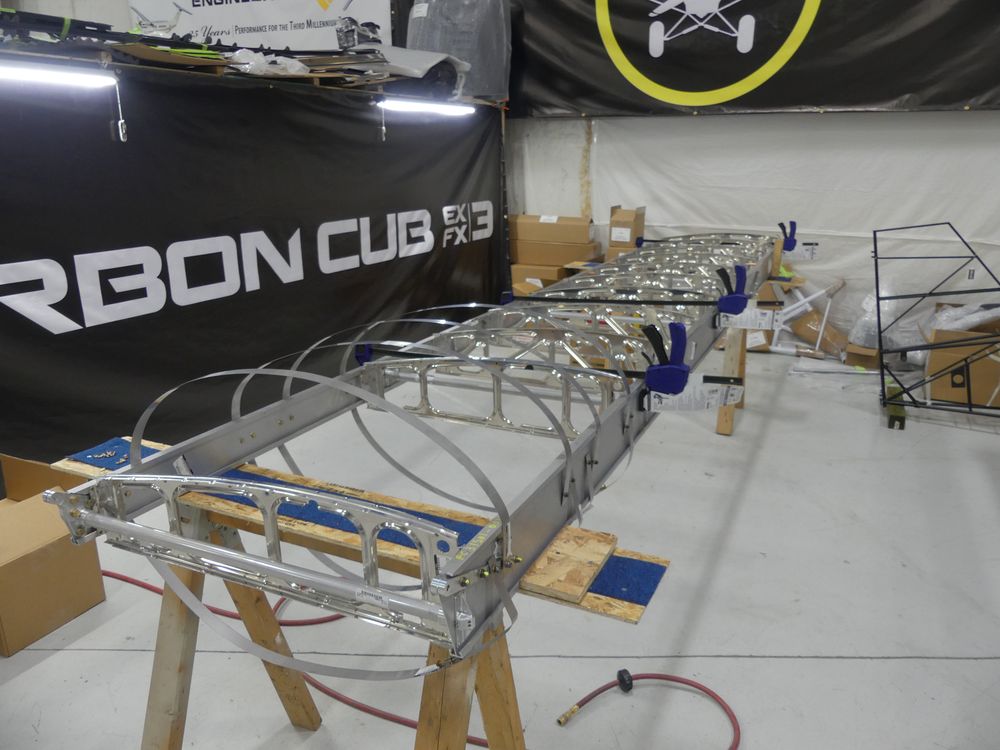
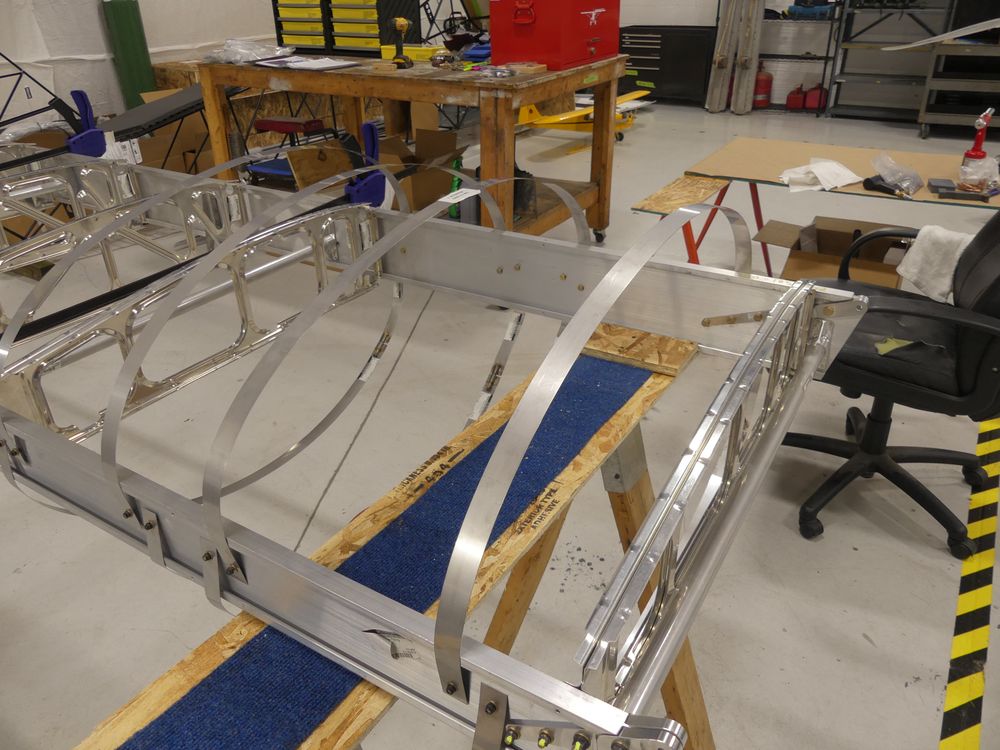
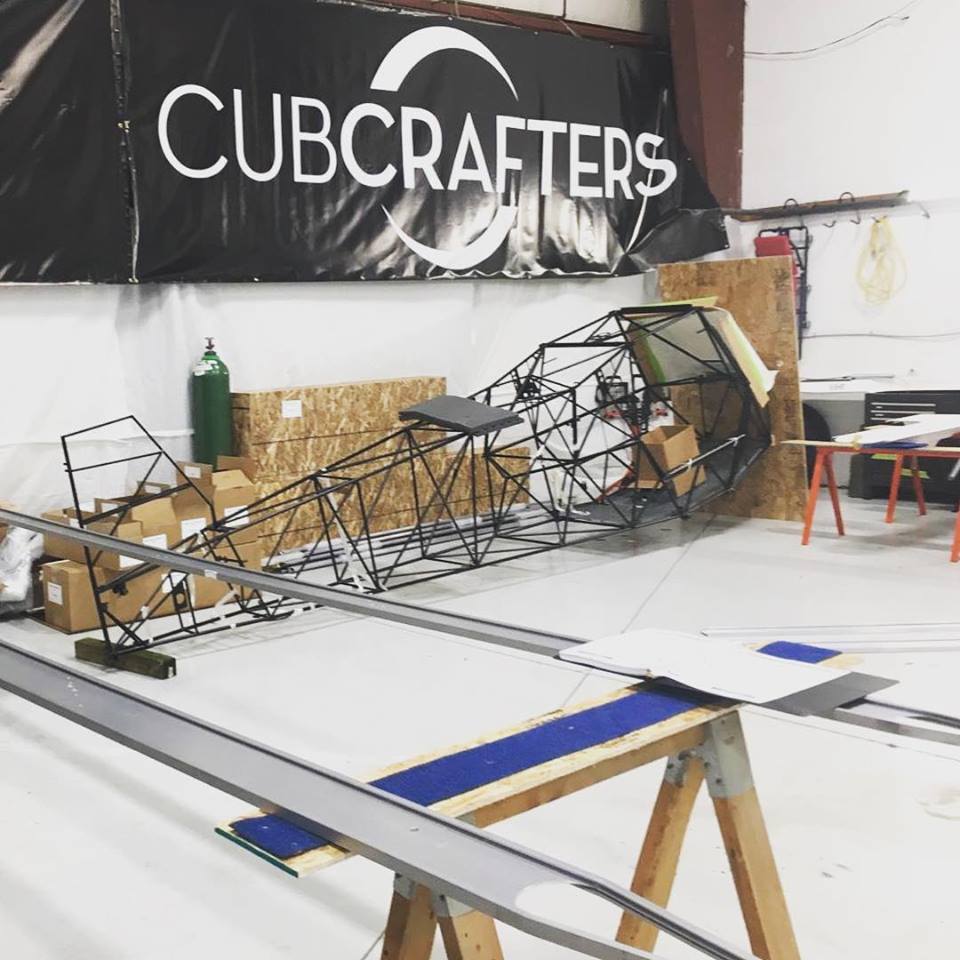
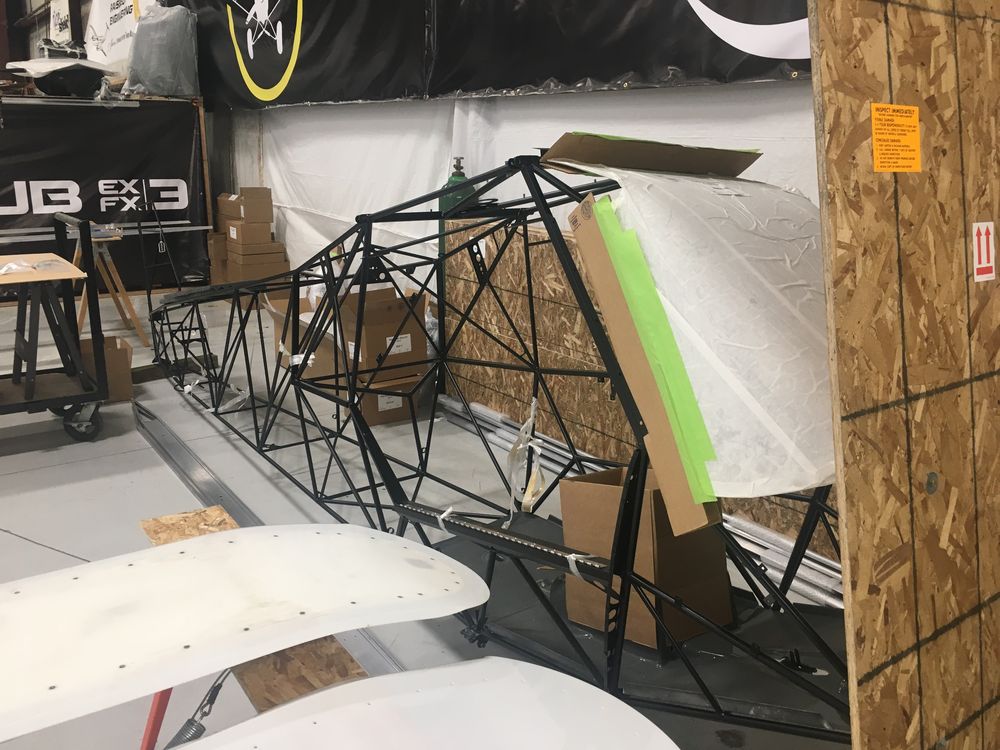
Yankee One is cooking right along, wings were completed and are set aside and awaiting cover and paint. I am maybe 90% complete with the fuselage and then it will be ready for cover too. Being this is the first run in the fuselage assembly, I have been challenged. The revision of the manual is part of this project and I am looking for areas that need to be linked together. As an example, I had early on installed the extended baggage liner and that was a good experience. It went well. Later on I had to install the stringers that give the fuselage it skeleton shape under the covering. One of those stringers is a tube that goes in the belly. It would have been far easier to have installed that prior to installing the baggage liner. It went fine but frustrating doing it lying on my back. I should think having a rotator for the fuselage would be optimal also. I have the cockpit all complete with the floor pan in and its parts that include the torque tubes, control sticks, rudder/brake pedals and control rods.
I have to also confess that you will do far better than I if you remove the protective plastic film on the baggage wall exterior before you try to bond them to the airframe. I was under the impression that the plastic was just on the inside surfaces which I left on for protection during the build process. That makes sense right? As such, there was an extra step and a little extra epoxy used oh and a special note for the manual.
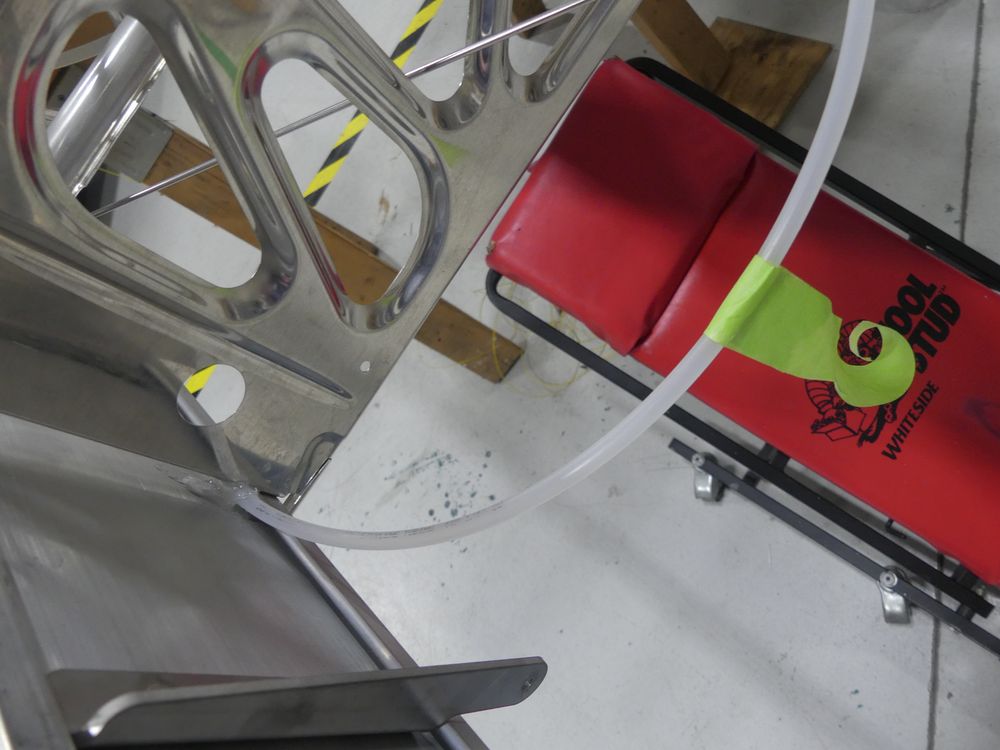
The jack screw and trim motor went in just fine and no problems really further. I also had to modify a ¼” reamer so that I could do the reaming that is recommended on the rudder hinges. Do that job by hand on the closed in end of the rudder. Last I guess is the fuel system. It has gone in well but I seem to be hyper sensitive to its routing and making sure there are no kinks, bends, crushed lines or cracks. It’s the life blood to the heart of this beast so that is important. From here I will start the boot cowl and hope to get it completed prior to the flight down to AOPA Regional fly in next week in Frederick, MD. If you are around, be sure to stop in and say hello. Look for N92LG in the STOL competition. Also, please join us for the 3rd annual CubCrafters Northeast STOL at Basin Harbor Resort (B06) on Saturday 5/25/19. It should be a blast. Thank you for following along.
4/8/2019 PROGRESS UPDATE
Here we go. It’s spring in the northeast and today it will be 55 degrees Fahrenheit. My son will have baseball practice outside in the school parking lot with the 10’ snowbanks as the homerun fence. Still, we are cautiously optimistic that it won’t snow any more here, but we all know it can happen right up until June 1st. The lakes still have plenty of ice and there are still several feet of snow in the woods of the Adirondacks just 20 miles north. I will hope to get a little more ski flying in before I leave for Sun ‘n Fun.
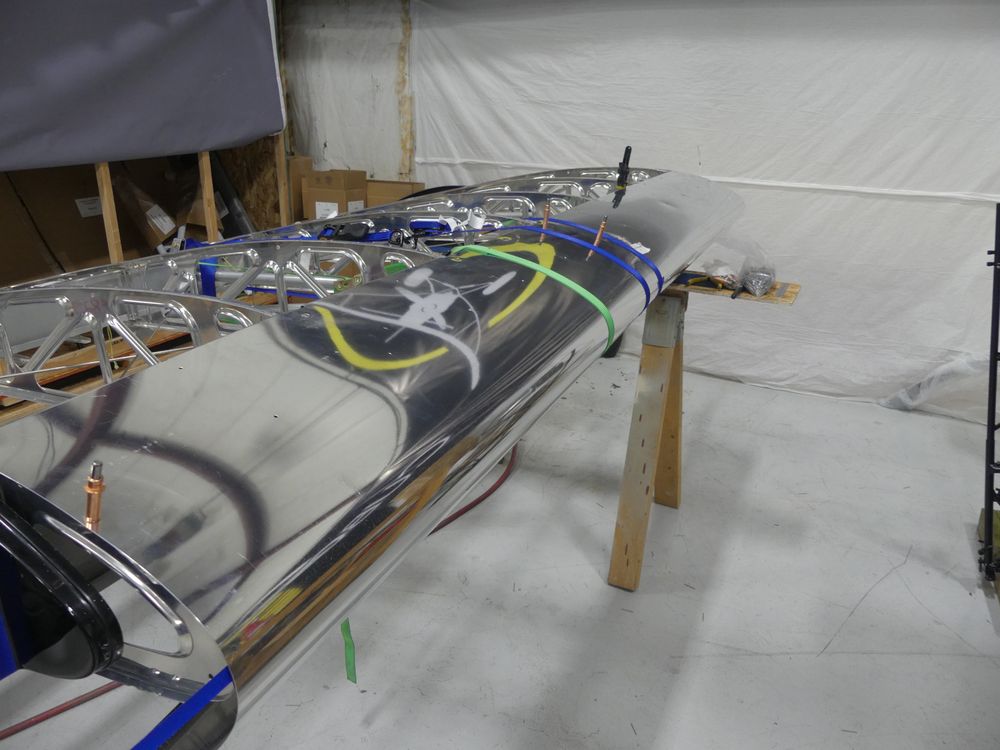
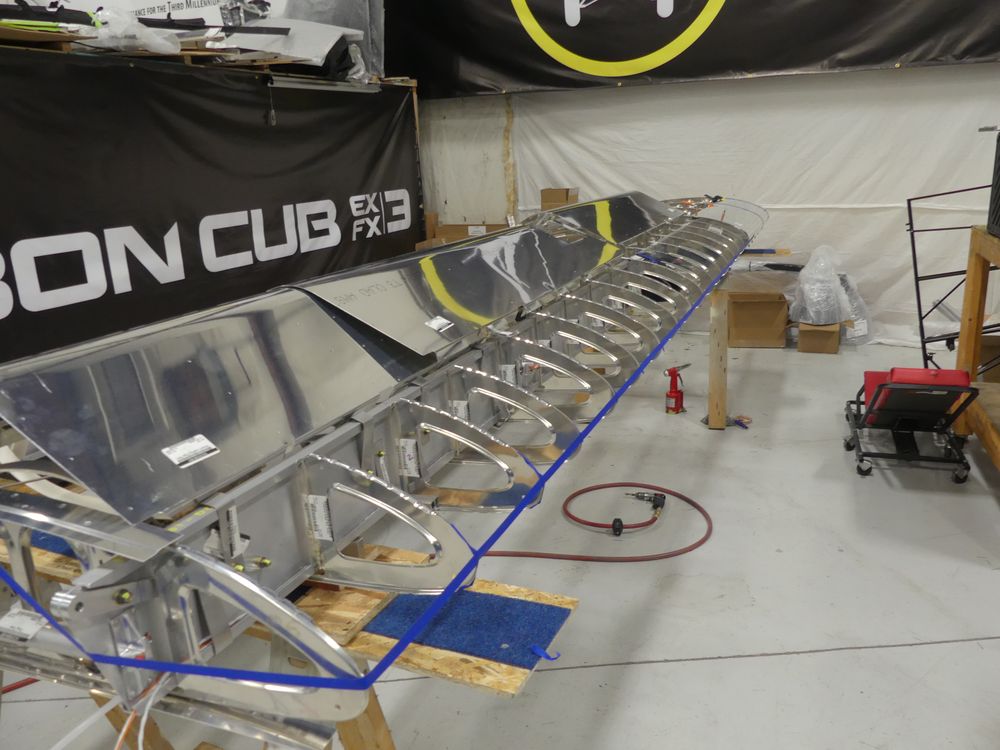
Since we last blogged here, I completed the right wing and I was able to cut the build time in half compared to the left. Reading the manual and taking my sweet time on the left wing, I was right at 180 hours. Yup, that sounds high to me too when I say it out loud, but I cut that to 90 on the second wing so let’s just average them shall we? I will caution you that just because you did one and got through it unscathed does not necessarily mean that wing-2 will go that way. I was troubled in a couple of instances on the 2nd wing and, while no harm was done, it was frustrating. On the last rib there is a support strip that goes on the BOTTOM of the spar and machined rib… I put it on the top. I learned that lesson now two times so I made a notation in the manual so others will benefit from my mistake. It has been a great experience and with 2 wings done and ready for cover, there is an air of confidence, “its gonna fly”.
I have been working now on the fuselage for a week or so now and my pace has moderated. It’s the first time through these steps and I want it to come out nice. I am sorting through steps that seem counterintuitive initially but make sense after looking ahead in the manual. I want to suggest again that you read through the manual before you start your project. Honestly, I did not do that. I followed builders here and there on the forum but like most, I suppose, opened the box, did the inventory and hit it.
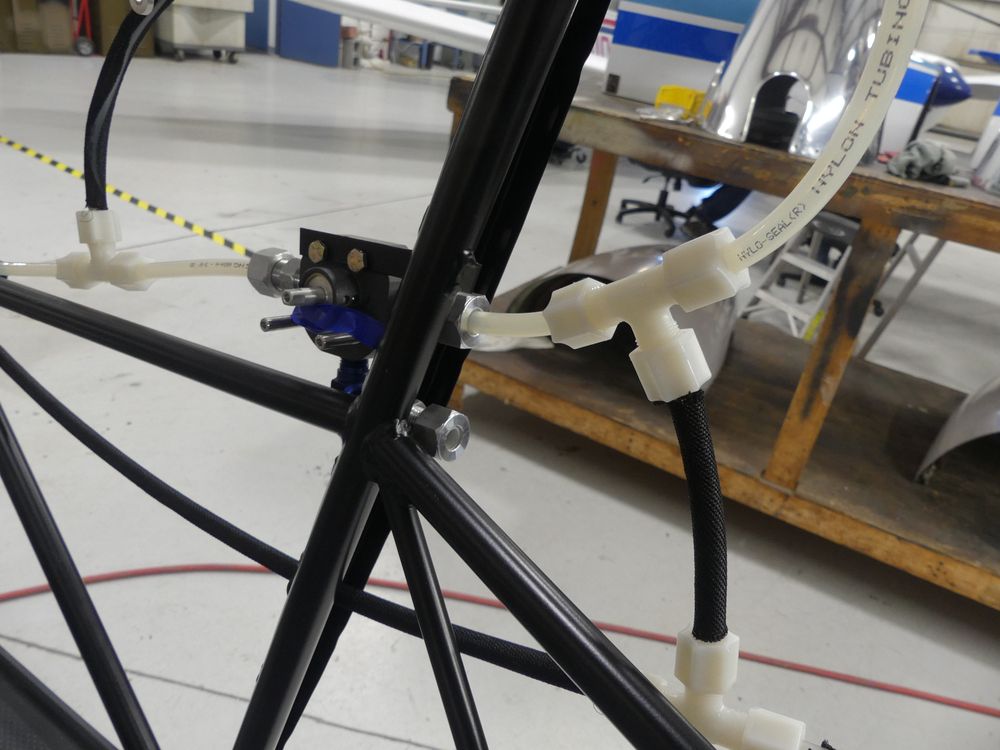
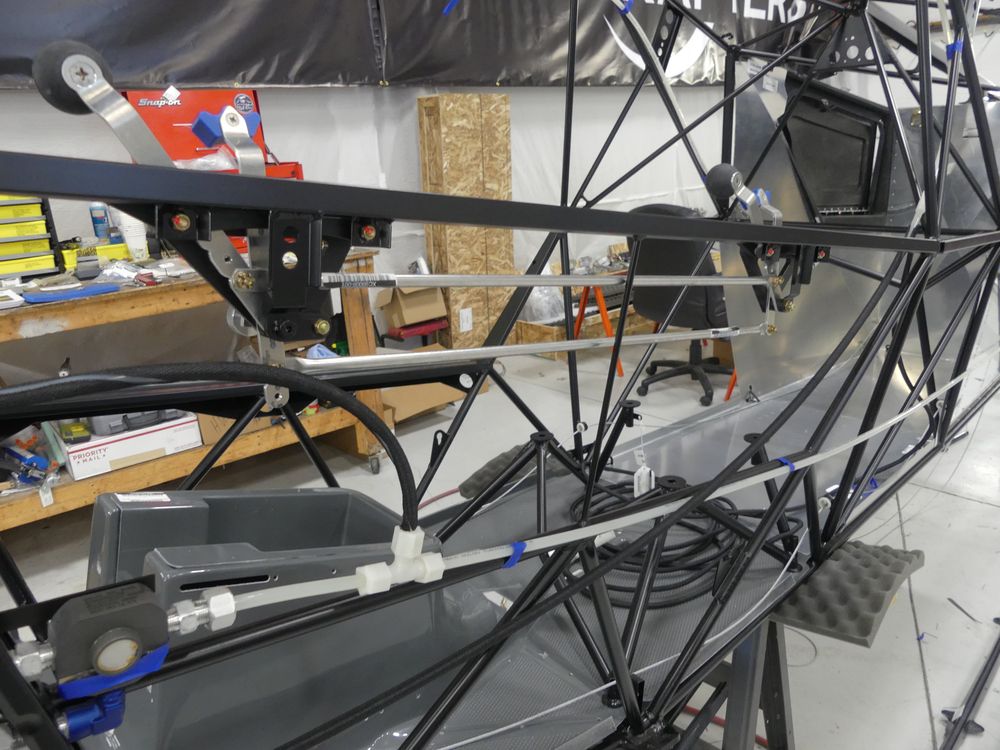
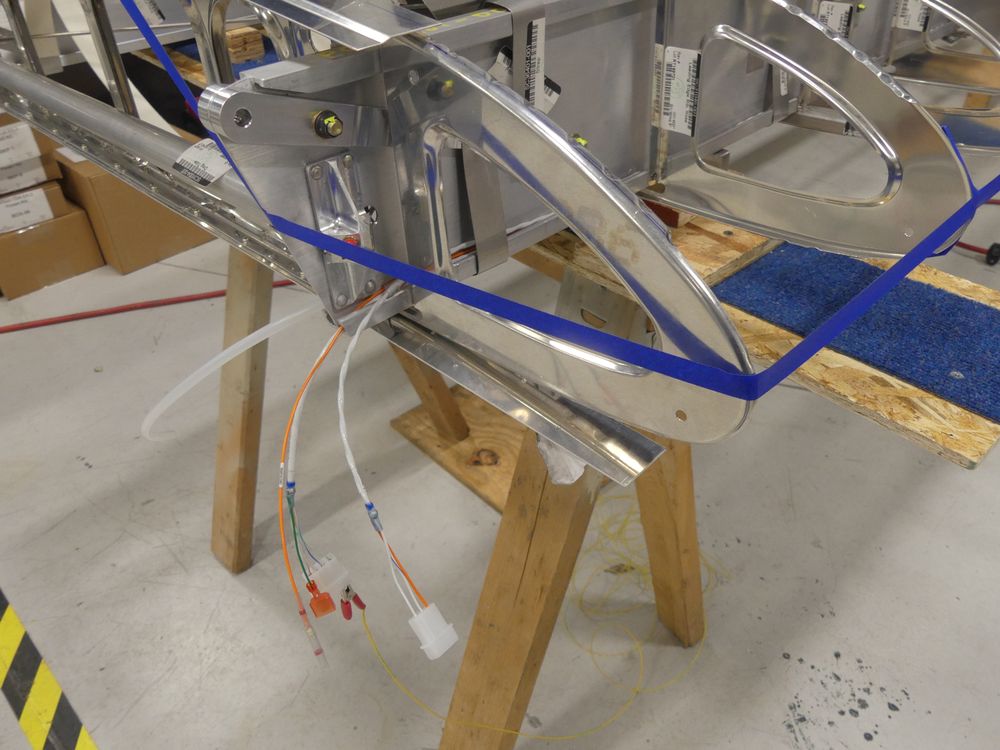
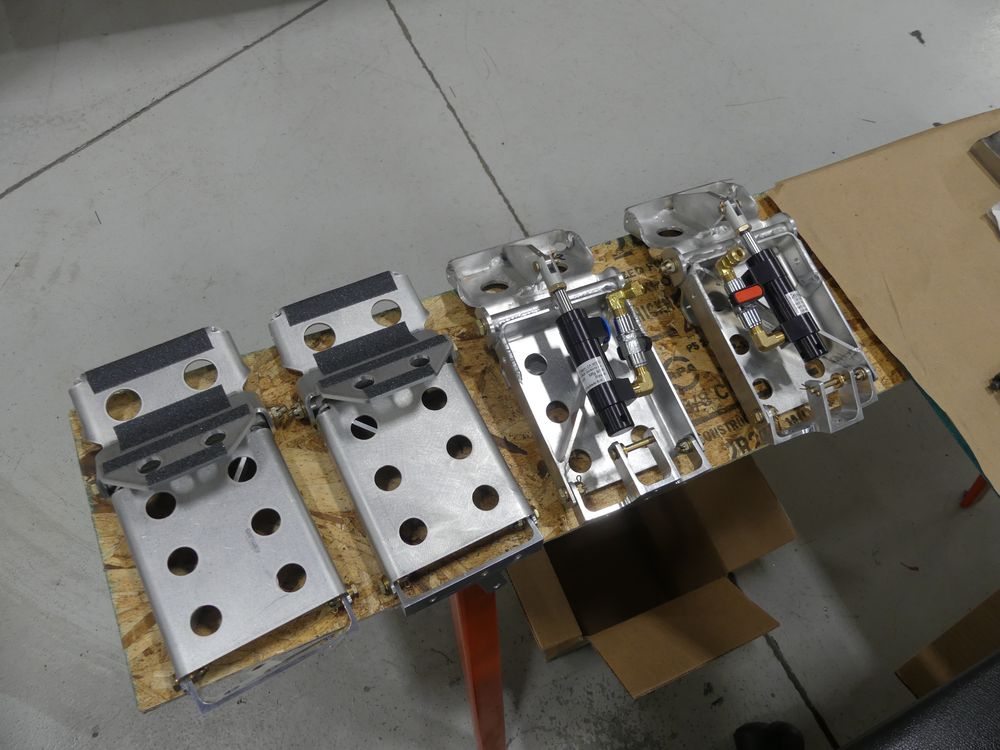
Now I have the extended baggage installed, the fuel lines are routed and loosely connected, the fuel selector is in and even the throttle/prop controls are built and mounted. Control cables are positioned and today I will lay out the floorboard configuration installing the torque tube, control sticks, pedals and some other small items. From there, I will attach the carbon fiber stringers on the sides of the fuselage, and then attack the tail section, jack screw, and motor.
Stay tuned as we approach the cover stage. Still plenty to do but we can see good progress for sure. Thanks again for following along. Mark
3/14/2019 PROGRESS VIDEO
2/12/2019 PROGRESS UPDATE
Hi-ho from New York’s frozen tundra. The arctic blast that spent a week in our area proved to me that Mother Nature has a plan. We have had two very sizable snow falls just recently and as I write this, we just came off of 3 +50 degree days and tonight we have freezing rain. That is winter in the Northeast. I did eke out a little flying with a couple of nice days where I went out for an hour or so and hit a few lakes and fields.
Over the process of building the left wing we have learned a great deal more about self. Self is impatient. I highly recommend for all builders to give yourself an extra pause when you change operations. In my case an ever so small drill bit size change can add extra work if you miss the note to change the size. None the less, all was not lost but these are the little setbacks I have experienced as a first-time builder. Also, I got ahead of myself in a section that asked for 4 nut plates with driven rivets to be installed on the front spar 72” from inboard. Now, I must have been on cruise control, looked at the manual, saw the parts and the drawing and the general location but totally missed the distance. There were four similar holes further outboard and that’s where I put them. Just a quick glance and boom, I did it. Not until later (read: after the leading-edge was installed) did I realize my error. Now I had to become a professional angler to fish a piece of wire through the spar and out the top of the leading-edge at one of the rib cutouts and put a nut plate on with a knot behind it and pull it through and into place. Whaaaat a TREAT!
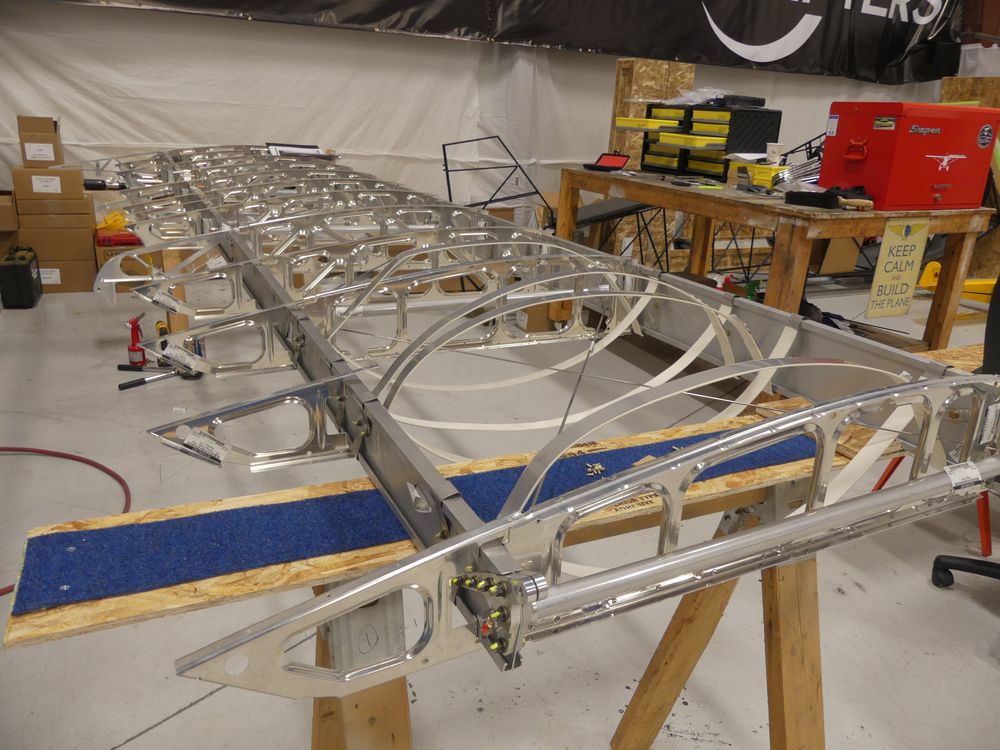
To bring you up to speed, at this point I have the trailing edge false spars for the flap and aileron both installed and all of the leading-edge is now hung and riveted in place.
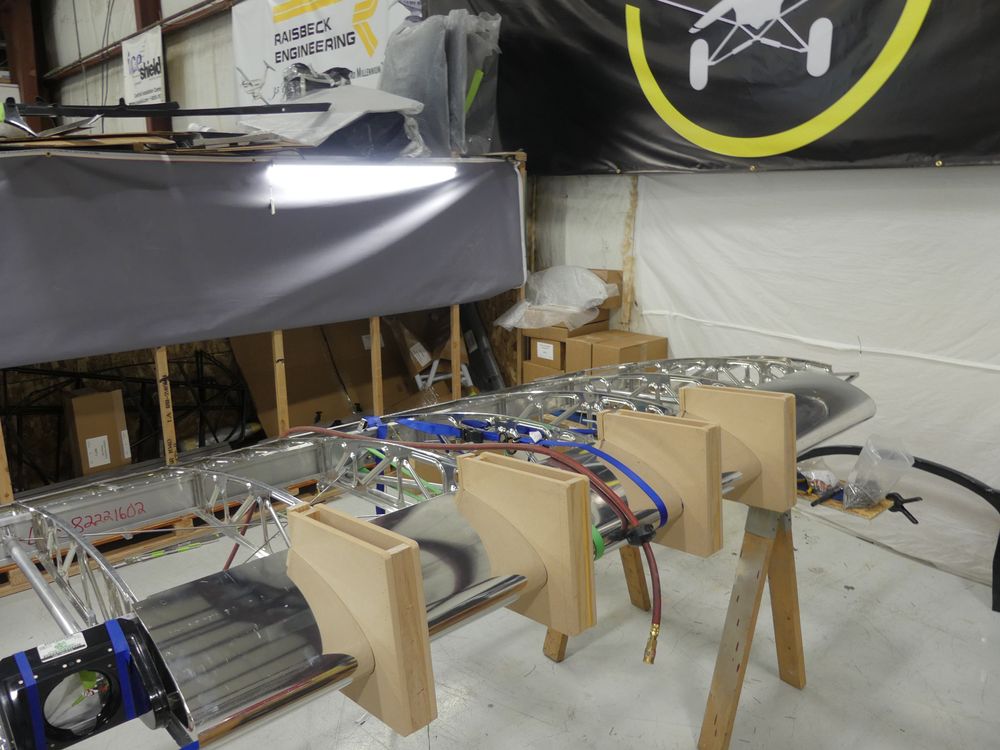
Here I want to stress the importance of the clamps. The leading edge clamps are required! They are also different than what would be used for the EX or EX-2. The reason they are different is because the inboard skins wrap around the whole leading-edge and have a lip that overlaps both the top and the bottom of the front spar. I borrowed a set of leading-edge clamps and will return them to the owner once completed. These clamps insure the leading-edge skin is tight against the ribs.
Also, it is important to have a method whereby you keep the nose ribs in place as you start to skin. I did this using a length of masking tape but I also incorporated the long piece from an Irwin squeeze clamp.
It is about 3.5’ and has the rubber clamp head on it and worked great for reaching down inside the leading edge length-wise and lining up the nose ribs on the pre-drilled holes on the leading edge. I also used a Sharpie fine-point to draw a center line on the nose rib itself that I could see through the pre-drilled holes on the leading edge skin. Once on center, I drilled and then riveted.
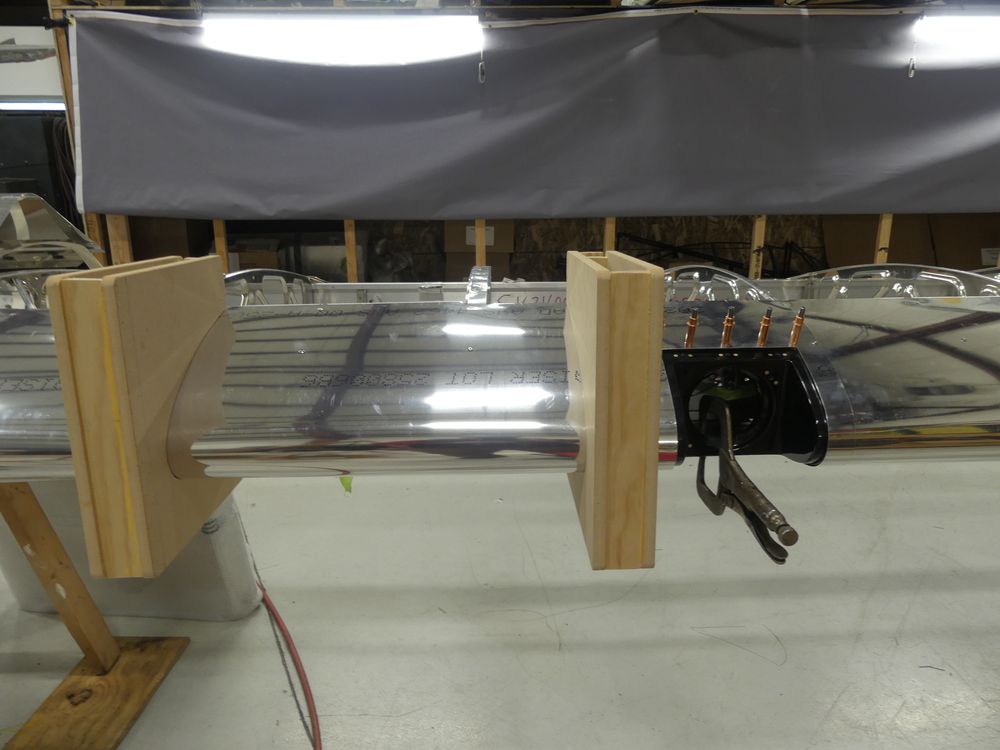
With the leading edge skin complete on the facing side, it is now time to use the drill guide (blue L Shaped piece with 2 holes in it) to attach the back side edge of the leading edge skin to both the top and bottom of the front spar.
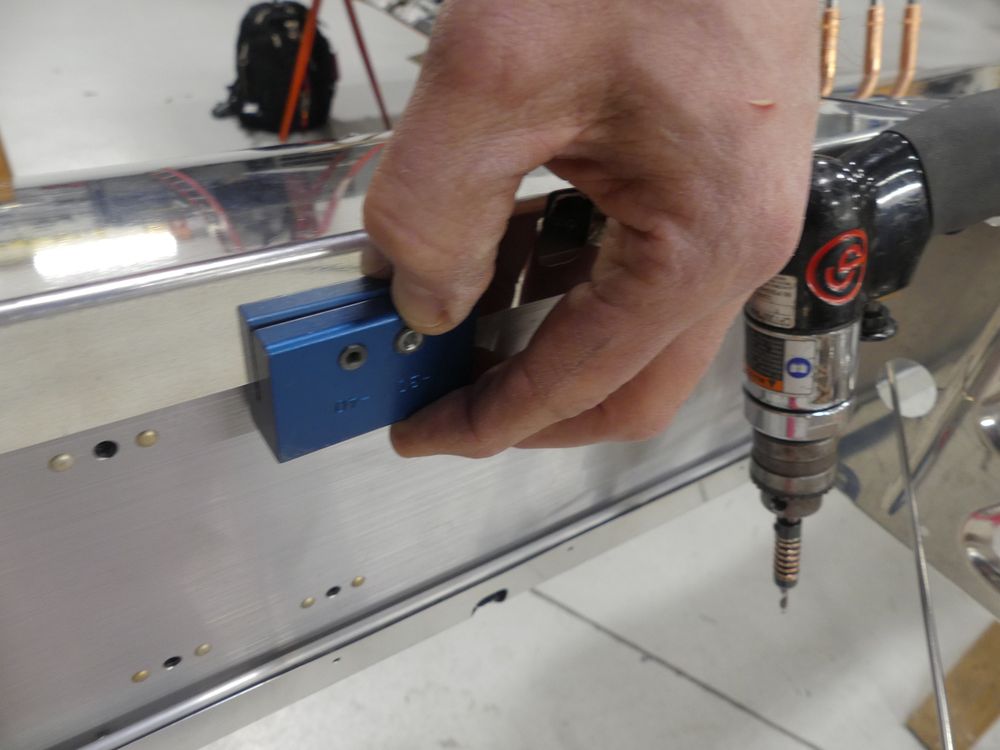
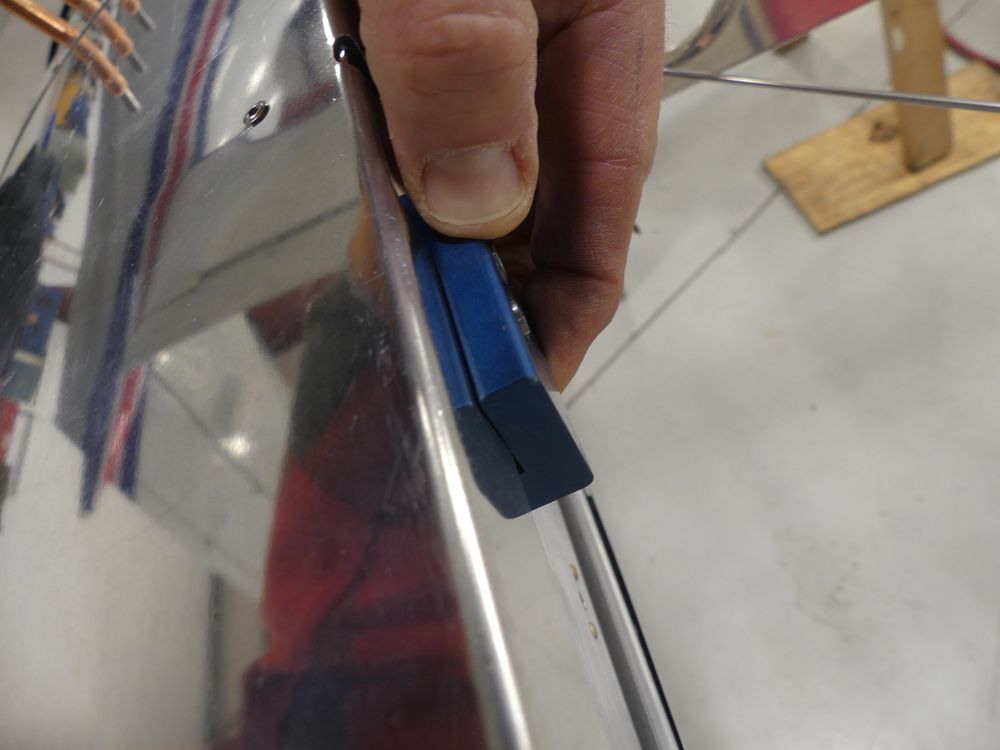
This is different from the EX-2 as there is no edge to wrap around the spar and rivet. The importance of the guide is this: it has the preset distance so you do not hit the spar bulb with the drill. Hit your spar bulb just once and your $5000 spar is junk. (Read the beginning of your wing manual and then read it again!) This might be the most critical step in wing assembly in my opinion. The guide assures your success.
With that part is done, the pitot/ADAHRS tubes are installed and all the wires are run in the spar. This week, I will have the wing tip installed, then the fuel tank, then the pulleys and wing control cables. Finally, this wing will be ready for cover/paint. At this point I feel I am about a week behind schedule and hope to make up ground on the second wing. I did take a bit of time to assemble on the rudder pedals. There is still plenty to do.
Shortly I will announce a fly in breakfast and invite all to fly in to the build hanger for pancakes, eggs, sausage, coffee, etc. It should be a great treat and hope many of you in the area can attend and check out Yankee 1. Thanks for following along. Mark
2/7/2019 PROGRESS VIDEO
1/22/2019 PROGRESS UPDATE
As part of this building project, I committed to write periodically in the blog and also suggest updates to the manual. Indeed, it is no small task. I began shortly after Thanksgiving and started on the left wing (pilots left). I would consider myself rather knowledgeable around an airport and airplanes in general. I am no A&P or IA but this build project is meant for the novice. Yes most anyone can take on this task with good discipline and organizational skills. Granted, I do work for the factory but part of this endeavor is measuring how we are doing from a supplier perspective. How are we taking care of you, our customer, after you bought one of our kits? I think things are going well so far.
Like any project big or small, plans are key. Getting organized, having useful tools in place and knowing how to find things quickly is a big help. Layout is also important. A functional work space where there is not much wasted time or steps has helped me. I have not hung up the parts and pieces on boards like I’ve seen many do, but I have a pretty good visual memory, and my kits are broken out so I know where to find things. Many folks do well learning from a book or even from a proctor or a video. I learn best by doing. That said, some of these processes are new to me. Bucking rivets, as an example, is something I have done but I certainly am no expert. I suggest practicing this significantly beforehand.

The left wing is well under way and I probably have another week left before it would be ready to cover. If I have had challenges, they are due to a lack of specific experience. As I said, I am mechanical but installing rivets on sheet metal for a domestic heating system is far different from counter sunk rivets on an airplane wing rib. A poorly installed rivet in the heating system vibrates and maybe creates a little annoying noise. On a fabric covered airplane, it does not hold surfaces together tight, it vibrates loose and failure can occur or a sharp edge can cut thru fabric. So there is a small learning curve using tools I have never used before, but this is not brain surgery.
Being “type-A” and a little high strung, I tend to shoot first and ask questions after. Yes, I have always been the guy to build the crib without the drawing, even though it’s right there in the box. Only after I get stuck or worse, break something, would I consult the directions. That will not fly here, no pun intended. It is not a great formula for building a plane you plan to fly yourself. I have had a few simple instances where I did not know a proper clearance for a wing rib part near a spar bolt, as an example. How do you know this if you are not taught or do not have that practical experience? You have to keep in mind when working on this that everything moves, flexes, or vibrates. So rivets must be flush, there can be no sharp corners or edges, measurements are crucial.
In building, I have had a few challenges and my biggest so far was what I hope will be a one-time mistake. It cost me dearly in time and my frustration level was pegged. It reminded me once again to park the “type-A” personality, slow down and recheck the work done.
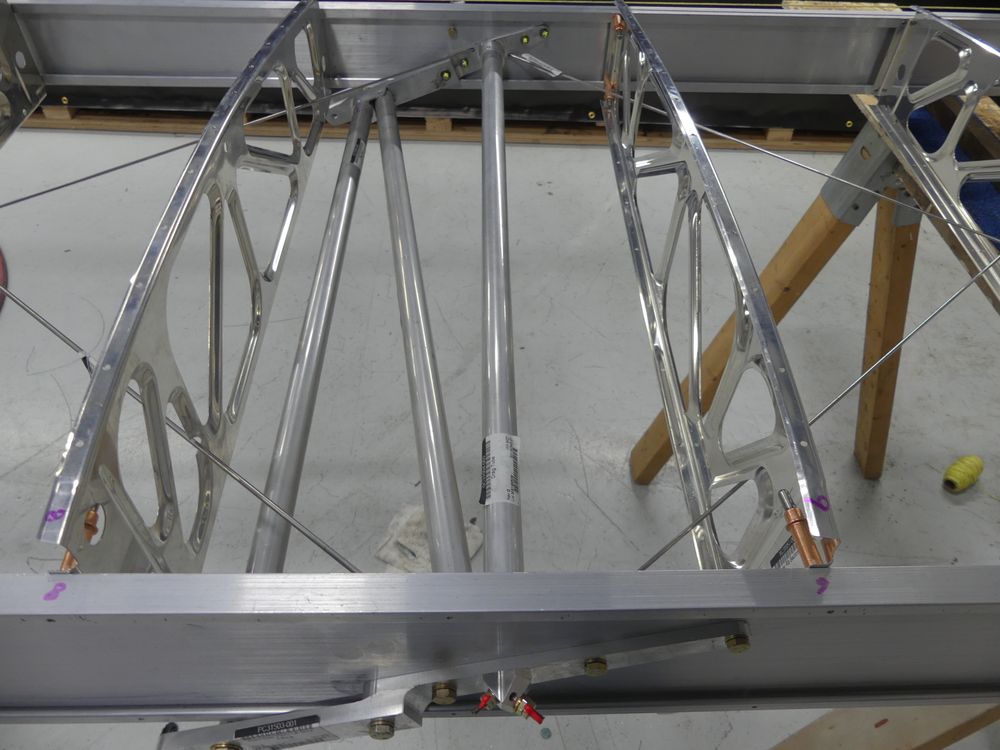
I have installed all the drag tubes and drag wires that are used to square the wing. This can be challenging because it is a progressive process and you have to get the initial inboard wires set properly before working your way outboard. Yeah, I had to do it twice! At the lift strut attach fittings on the spar, there are 3 drag tubes and one of them has the hardware inside the hollow drag tube for attaching the brackets to the spar. On that one you must tighten and torque the bolt and nut and seal it before installing the other drag tubes because one of those tubes goes over top and hides the nut. After the drag tubes get riveted you then rivet in the remaining ribs outboard and set to install the drag wires to square the wing. I don’t care who you are, but if you get to where the drag wires are being tightened to square the wing and you realize you forgot to torque that one bolt, you’re going to have to take a seat and think about what you forgot. I was frustrated and after an hour of looking at the situation and seeing no way to resolve it, I had to undo my work so I could go back and torque the assembly as needed. I had to eat that one and chalk it up to lack of experience. We have many resources on our website through the forum posts of our builders and our factory support team. You just cannot be in any hurry, and if you feel you are, I suggest you take a walk.
But I got it square. Again, I just have to slow down. I back track a little to be sure I did not miss anything. I now highlight everything that I have read in the manual and then complete the step or process. I then mark the page as that is complete. I will say that any builder would do well to set aside time to do this without interruptions. So put the cell phone away and try to stay focused. That may be my biggest challenge as my sales job comes first. Stay tuned for more updates along the away and as always you are welcome to visit the hangar. Mark-
12/5/2018 PROGRESS UPDATE
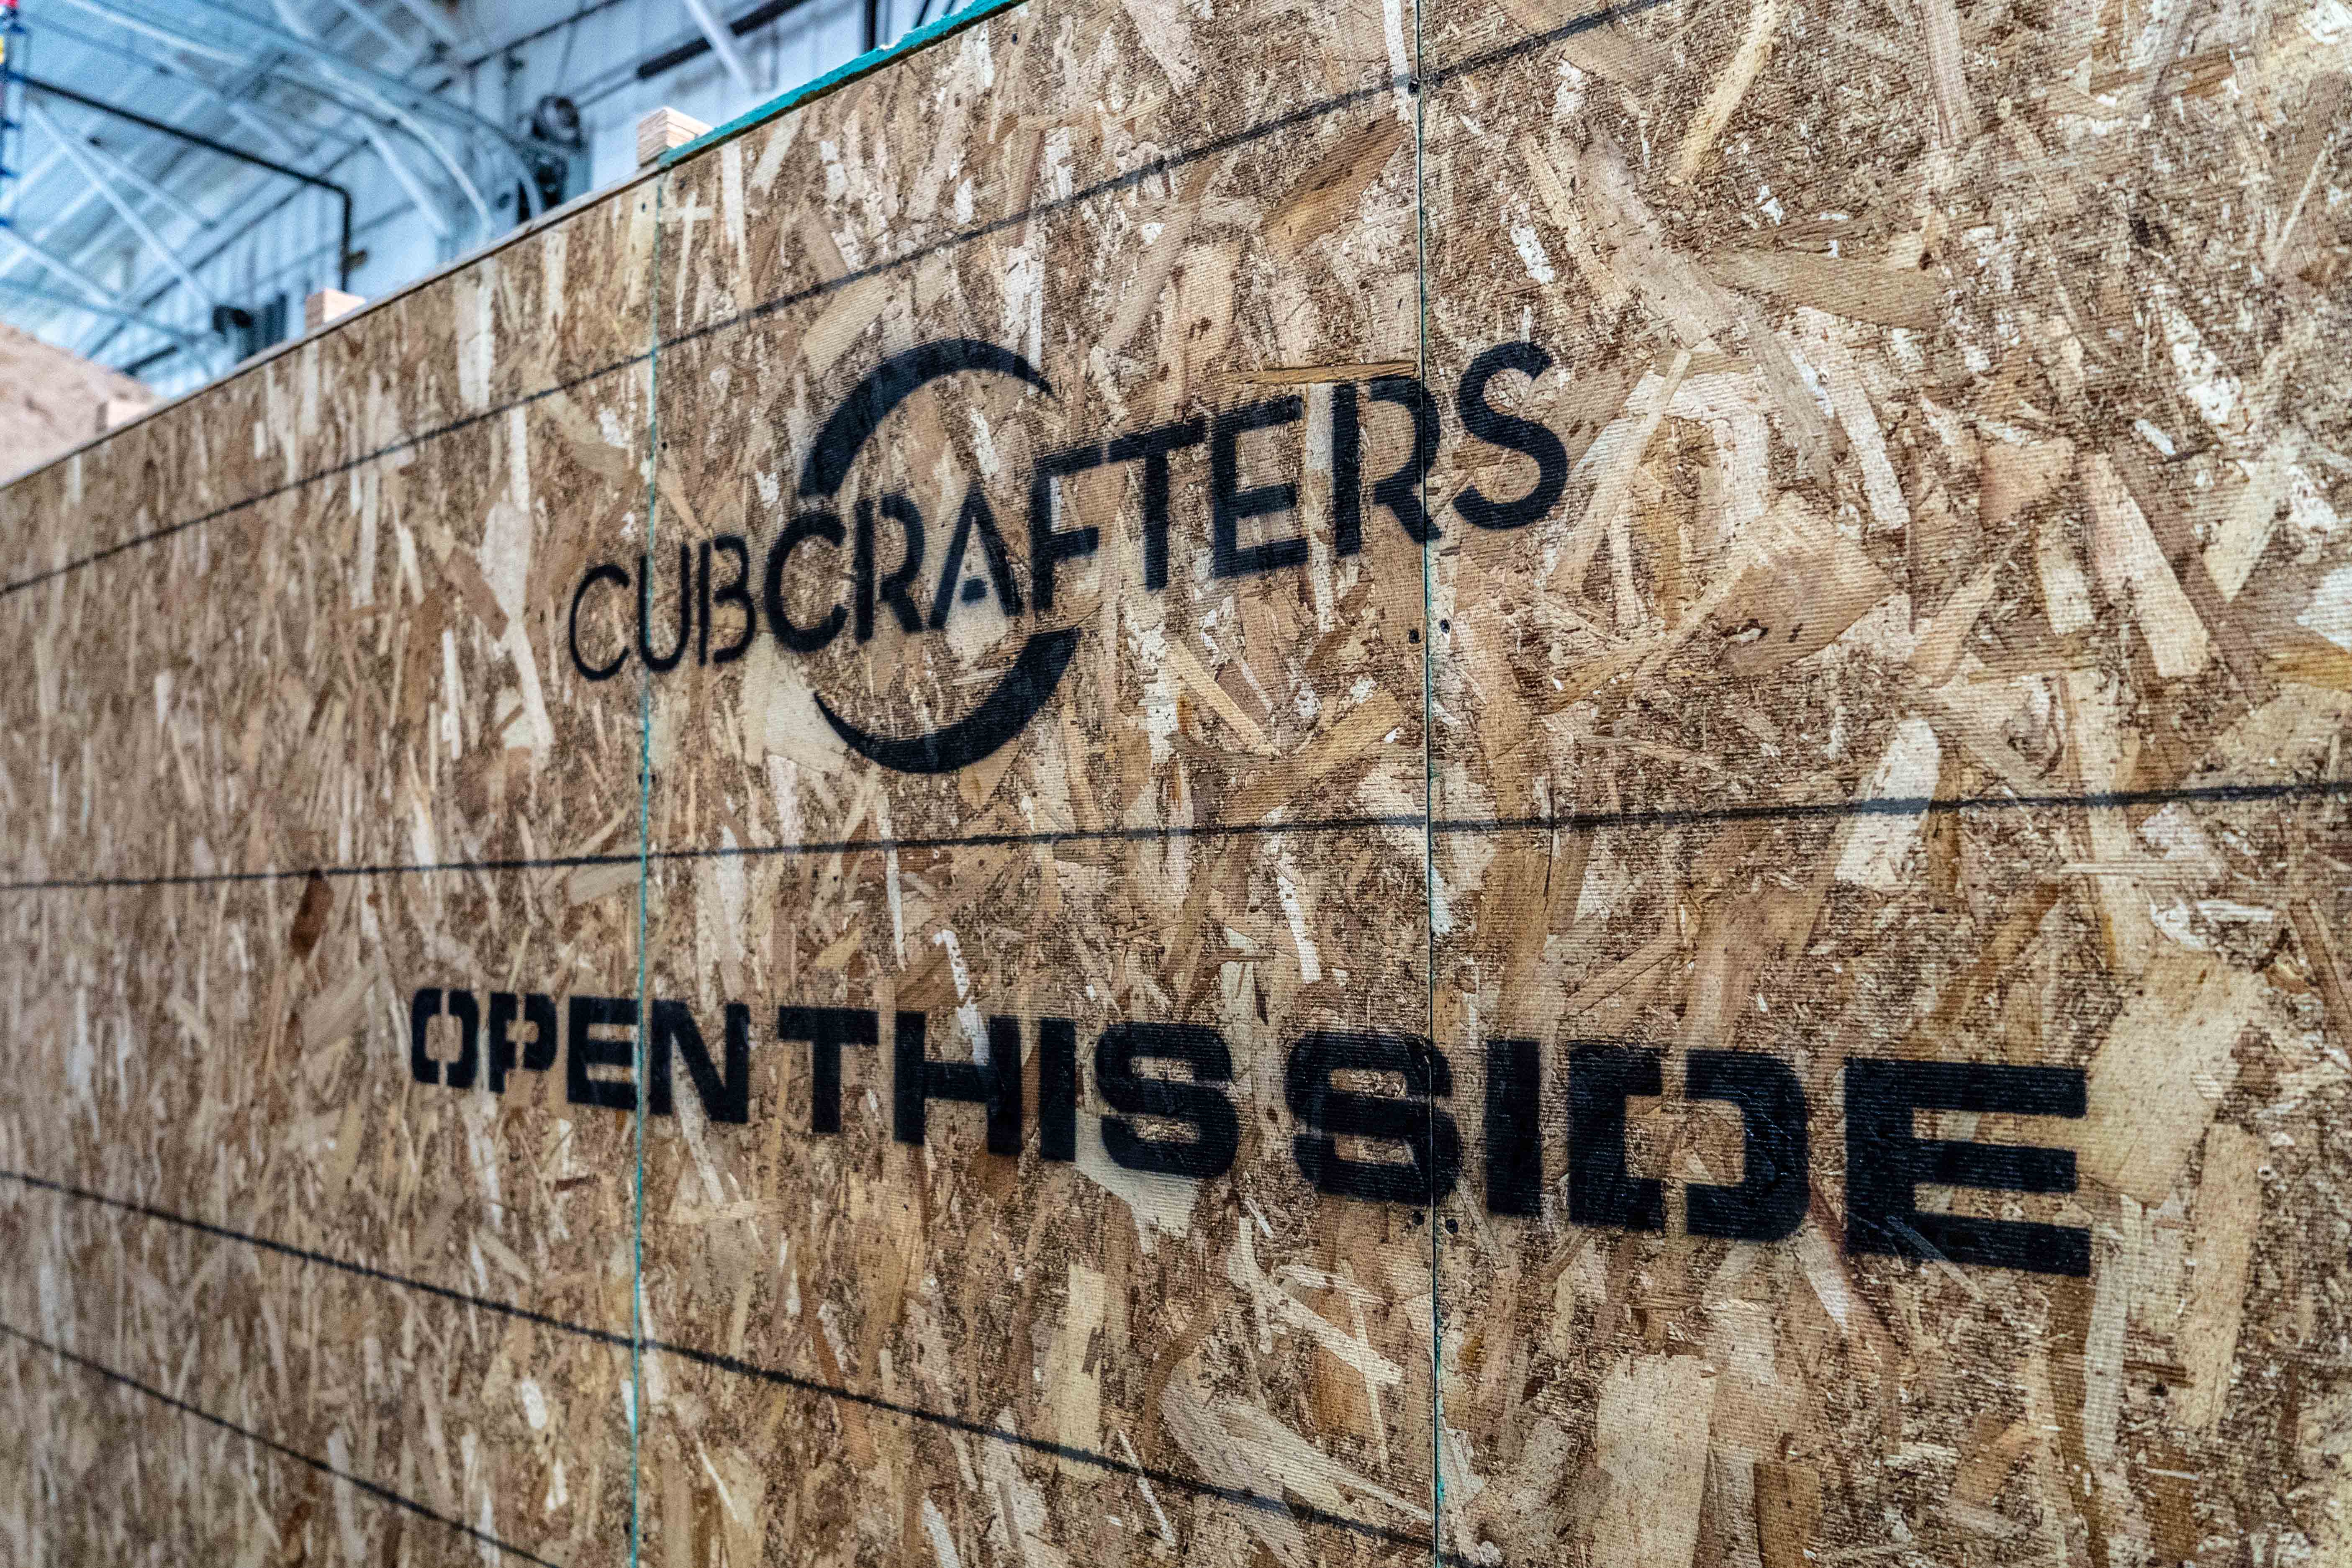
Hi again from the balmy northeast. With an early snow season, the YankeeOne kit arrived by Yellow Freight the day before thanksgiving. I had some experts with a four-wheel drive loader outfitted with forks in place of the bucket to move this jumbo-size box off the truck. It was picked up from one end and hauled out of the truck to the lift gate. Once the opposite end was on the lift gate, a choreographed dance was performed with precision to lower the big box to the ground.
CubCrafters’ Northeast/Great Lakes HQ secured a space 45’x25’ in the back of our hangar at North American Flight Services, Saratoga County Airport. This will be our home for the next 6-8 months during the building process of our EX3, aptly named “YankeeOne”. At this point we have not chosen paint/color scheme. However, we know the scheme itself will be in concert with our schemes offered at the factory. I do not expect any Yankee pin stripes on this hot rod.
Once the crate was open I quickly got to unloading it. Our parts team and shipping department are consummate experts when it comes to packaging, crating, and loading. The boxes are all marked per our three basic kits (Fuselage, Wings, Finish), so when you receive your kit you can organize the wing kit parts in one area, fuselage and finish kit parts in separate areas. I suggest a large table and a chair. Get comfortable, you are going to have a few hours invested in doing your inventory of the parts. During this process I learned that you will be circling back to the boxes/parts once the inventory is finished, so I do NOT suggest mixing any parts from the kits even though you may have a process in mind for organization. The parts you need to build the wings are in the wing kit, so keep it separate.
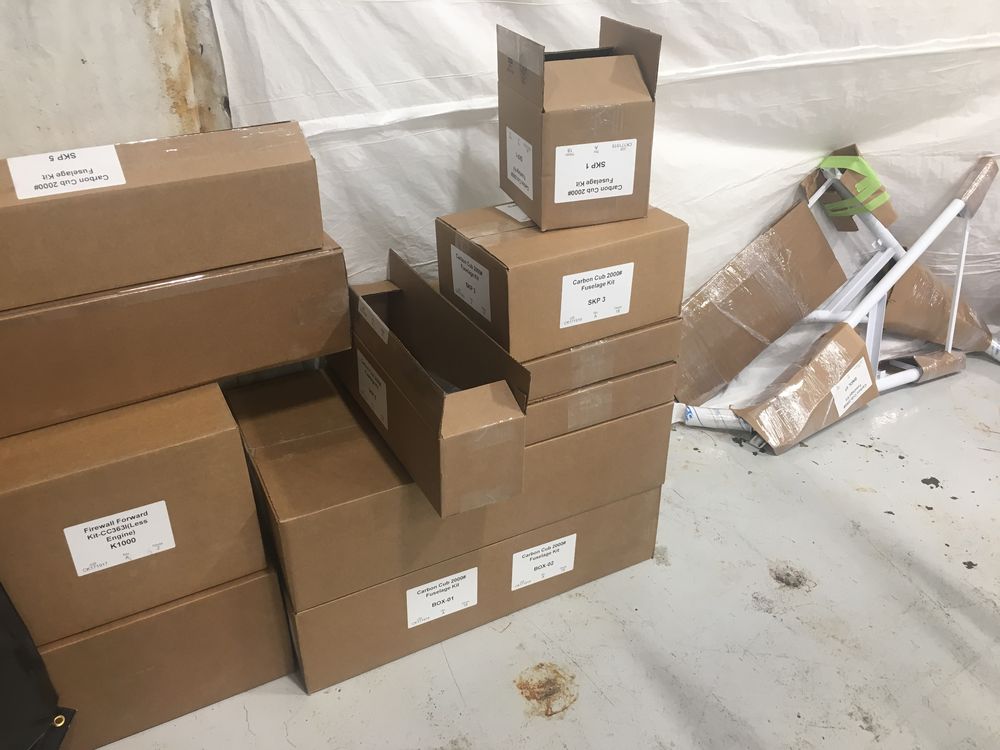
I had a little interruption during the inventory process with a ferry flight of an XCub from MN-AZ, so I lost a few days, but I think the inventory process can be done in two days by one person without interruption. It took me a tad longer. So now with the entire inventory done, I have my horses set up, the fuselage is out of the box and on the ground, and I have the right wing spars on the horses ready to assemble. Now to remember which box those brackets are in? I got it!
Stay tuned and look for these blog updates as well as our posts on the forums and live updates on Facebook. We also have a time lapse video coming your way periodically so you can see the steps and follow along. As always, you are invited to the hangar to check out the build in process. If you are flying in, the airport ID is 5B2. We have fuel, courtesy car, and local hotels. If you arrive commercially, you will be arriving in Albany, NY (ALB). We encourage groups and hope you will bring the young people in too. Stay tuned we’re just getting started. Mark-
November 16, 2018
In June, 2018 I considered the possibility of building a Carbon Cub EX-3 kit. I’ve been selling these things for a few years, and though I feel like I know the airplane pretty well from a pilot’s perspective, I would like to be better able to discuss the nuts & bolts… the details of construction, with more authority and I think that building the kit would be an invaluable education, and a fun project too! As the Northeast winter approaches, I’ll have some more down time. This might be be a great opportunity to keep busy and get my hands into a kit. I am no stranger to mechanical work. I was working on small outboard motors with my dad in marinas starting at 8 years old, and other projects such as snowmobiles and cars too. After I made a proposal, the senior leadership at CubCrafters agreed this will be a worthy project.
I tell prospective kit builders, “You can do it!” It’s time to prove the axiom to myself.
Both of the Carbon Cub EX kits are assembly projects, NOT fabrication projects. Even with modest skills, you (and I) too can build an airplane and in the process, save some pesos, bucks, dinero, geetus, Benjamins, frogskins, greenbacks, bread, clams… CASH BABY! Will it take some time? Yes. I anticipate 800-1000 man hours, but I must wrap my head around this and form a plan. Will I work 3 hours a day? 6 hours? More? Whatever it is, stick to the plan. My intent is to have this machine done and ready for my big reveal next summer.
Keep in mind, this is a big commitment for me, and I’m a bit nervous about it. I’ve already ordered the kit, rented space in a local hangar, and started collecting some specialized tools and supplies for the build. I’ll refer to other builders’ logs on the CubCrafters EX Forum, like those from ceslaw and Daveembry. There is also continuing discussion on the Forum from current and past builders. Of course I’ll rely heavily on CubCrafters’ technical support guru, Mitch Travis, as well.
I believe I am ready to start. Stay tuned and look for many updates here on this BLOG, the EX Forum, Facebook, and more. The CubCrafters team will field your questions and keep you updated. I’m excited to bring to you the play-by-play of my construction of YankeeOne!
Hi Mark — Great description of the start of the build process of the EX-3. Lots of good points for other builders to consider. I’m glad you have the opportunity to do this. I’m sure you’ll do fine — hang in there and be persistent but patient moving forward.
I`m interested in watching it being built I`m a re builder from years back. Located @ LNK.Ed
If you’re accepting internships (free help) I’d love to give you a hand and learn from you. Thanks.
Hi Mark,
Am a new pilot looking to purchase my first plane.. would you please be able to tell me how much this venture is costing you and with what options if any?
Regards
Benedetto
Hi Benedetto
Yes the basic kits cost for the EX3 was $29k for each. The wing kit, fuselage kit and the finish kit. The EX2 kits are $25k each. Once you have these 3 kits then you can figure out what you want to do about your engine and panel options. We chose to use Cubcrafters engine and panel. I suggest using their configurator on there website. Click kits when on the main page and then scroll down until you see EX2 or EX3. Select one of those and then scroll a bit more and you will see “Configurator” Here you can build the plane with options you wish as well as paint scheme and it totals the value for you. You can even look at different paint schemes and color options. If I can help further, reach me here or on the forum or call cubcrafters and they have my info too.
Benedetto I also should say there are certain options you may want to consider and if you have questions on those, certainly reach me. Thanks Mark
Ed and Barry
You fellas can keep watching the blog as its updated here and there will be more in depth video as it progresses. Also look for updates on the forum too. I am also posting on facebook. Thanks MK
Cubcrafters needs to offer those offset pop rivet heads for pneumatic rivet pullers in their store. My hands still hurt from pulling all this wing rivets a couple years ago! However, all that aching was worth it. I want one of those tools or my next one.
Scott
That is not an offset rivet gun, it is the one that comes in the Carbon Cub Toolkit from Cleveland Aircraft Tools.